I'm on "makecation" for a few days: Instead of going away on vacation, I'm taking a break by making things.
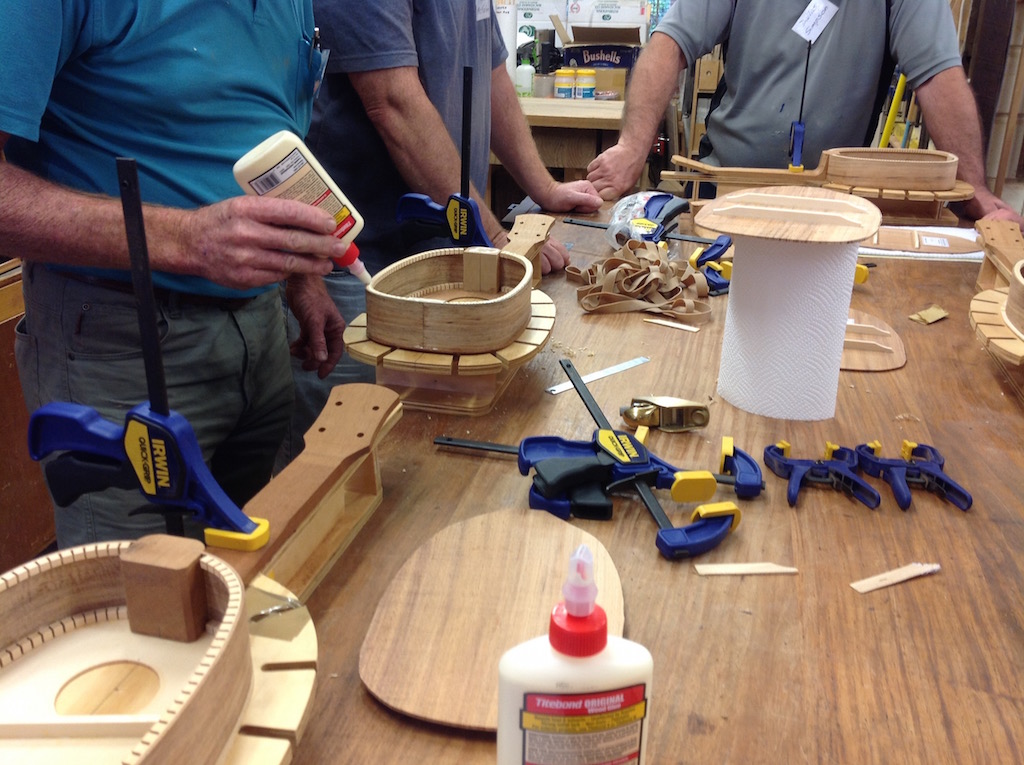
The highlight of my makecation is attending the Uke Klass run by Allen McFarlen from Barron River Guitars and Ukuleles and Micheal Connor of Localeles.
Today was the first day of the class. We're building a pineapple uke with a concert sized neck and soprano sized body.
A lot of preparation was already done in advance to prepare our kits: milling, sides shaped, necks laminated, etc:
The necks are made from Brazillian Mahogany and were glued using hide glue which is a collagen based glue that requires a heating pot to work with. The advantage of hide glue is any glue runs will be pretty much invisible under the finish. Any Titebond glue that we get on the surfaces will need to be cleaned up or it will show through in the finish. We'll learn about how to deal with that later in the class.
Here are the steps from today:
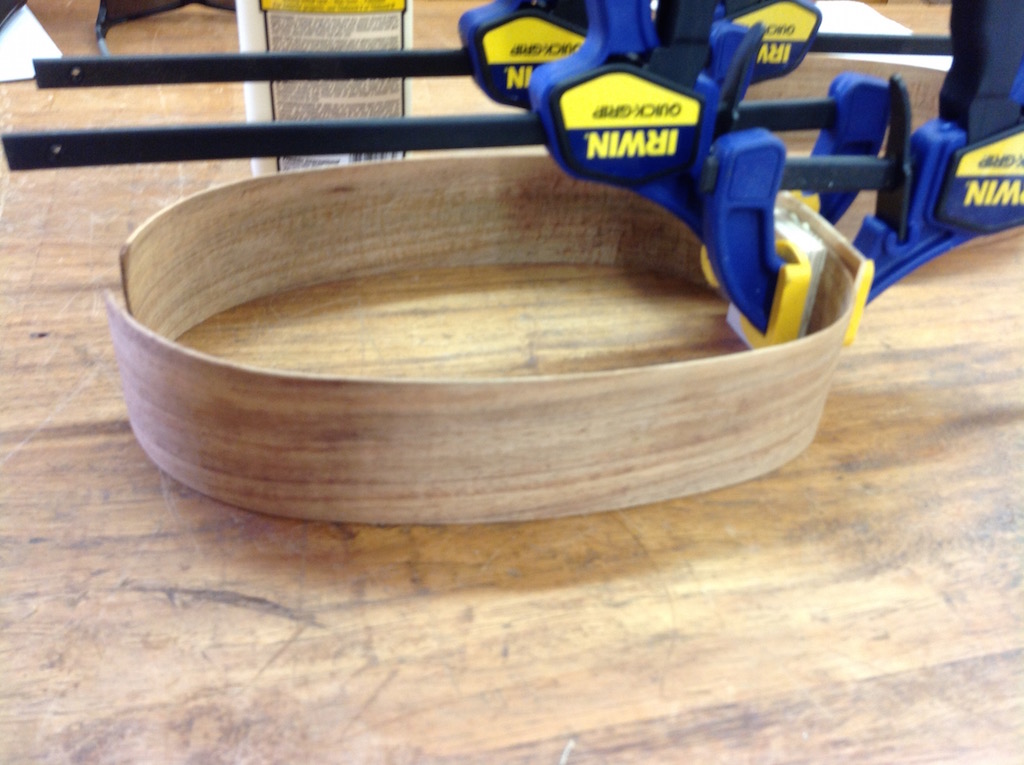
1) We're using Blackwood for the sides. The wood comes from the Otway Mountains in Victoria. We use binding tape to pull the two sides together at the base.
2) Apply Titebond Original glue (use the one with the red cap) to the flat side of the tail block. Use finger to spread evenly over the surface. Place into the center inside the bottom and clamp in place (one clamp on each side of the block). Apply the clamps in opposite directions so that the job doesn't topple.
3) Apply Titebond glue (by running a small bead and spreading with finger) along the flat underside of two brace pieces. Use a tiny dot of superglue on each end that will weld it in place while the Titebond is drying. Position braces inside the back and clamp in place using Pony clamps. We do this in pairs.
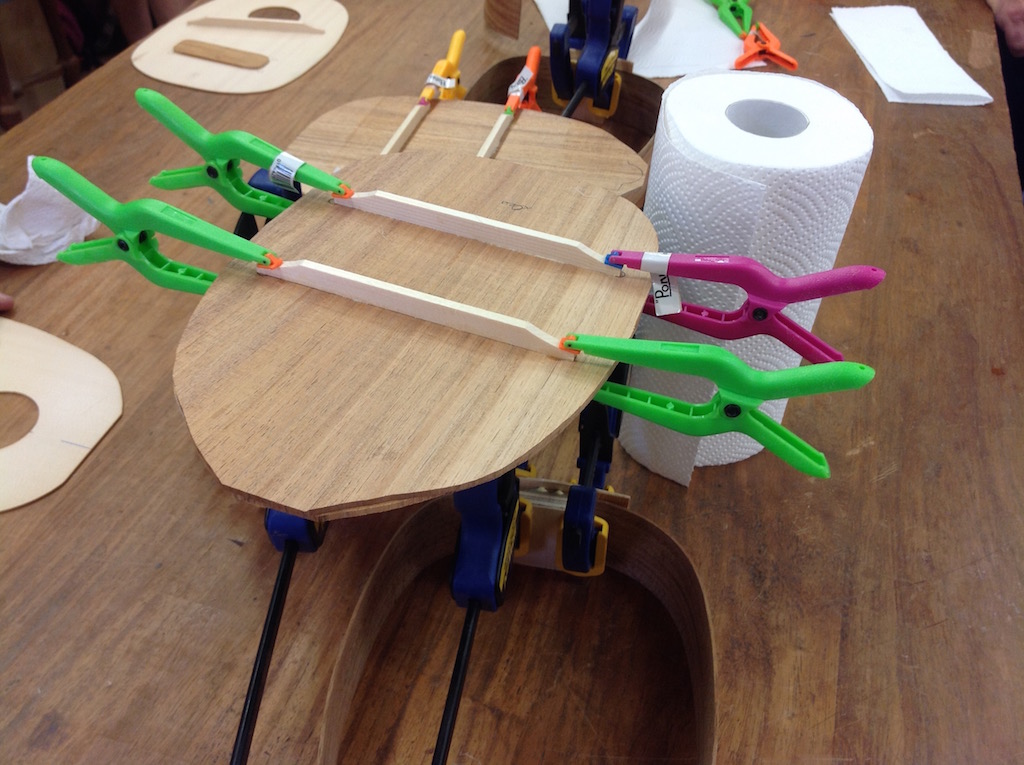
4) Choose a soundboard/top (I chose Englemann Spruce, which comes from The Kootenays in British Columbia) and use Titebond with superglue dots to glue the upper transverse brace at an angle on the underside of the top. Our braces are made from the same spruce. Press down firmly with fingers for a few minutes until it holds.
5) Apply a thin layer of Titebond to the bridge patch with a few drops of superglue to weld, and press firmly in place on the underside of the soundboard. Our bridge patches are made from New Guinea Rosewood.
6) Wait several minutes until glue becomes leathery and then clean up excess glue from alongside the braces using a small steel ruler.
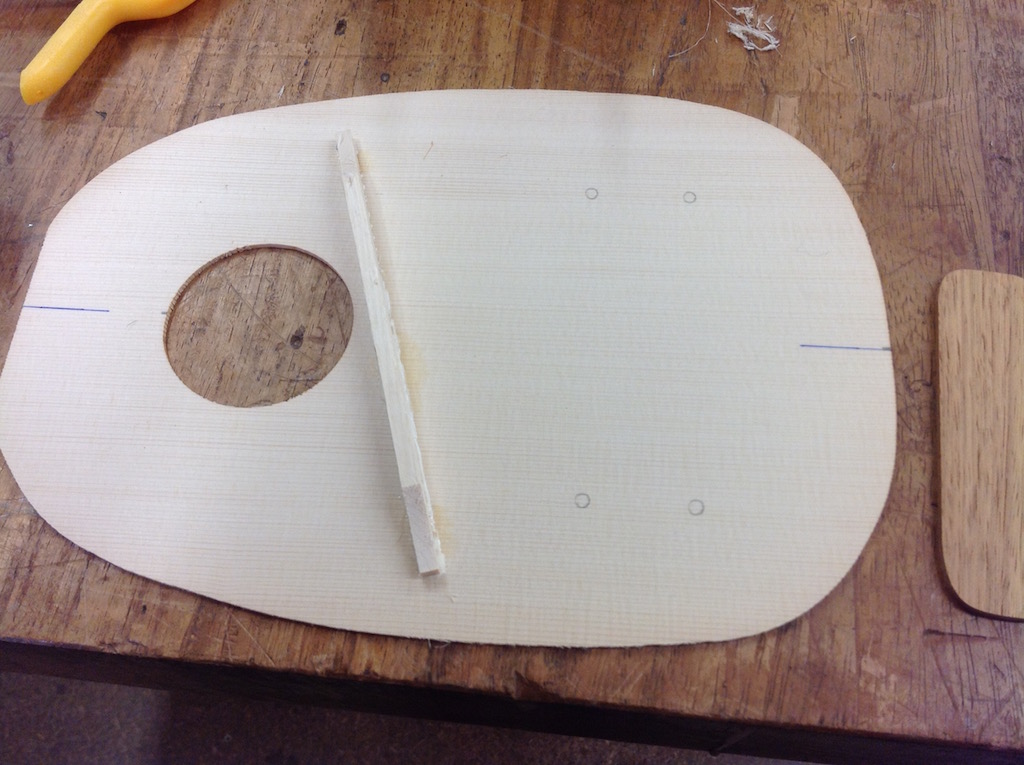
7) Now we start using the workboards. Place top front-down on workboard and line up center lines with lines of workboard. Use finger to apply a thin layer of Titebond to flat bit on the bottom of the neck that will attach to underside of soundboard. Position so that line in center of neck lines up with center line on the inside of the soundboard and clamp in place.
8) While we wait for that to dry, we lightly sand the braces on the back using 240 grit sandpaper (folded in thirds). We "break the back" of the sandpaper first over the edge of the bench.
9) Unclamp tail block and sides. Now we peel off the binding tape (slowly at a 45 degree angle to grain to prevent pulling up threads)
10) We lightly sand the corners off the top ends of the side pieces so that they will slide more easily into the grooves on either side of the base of the neck.
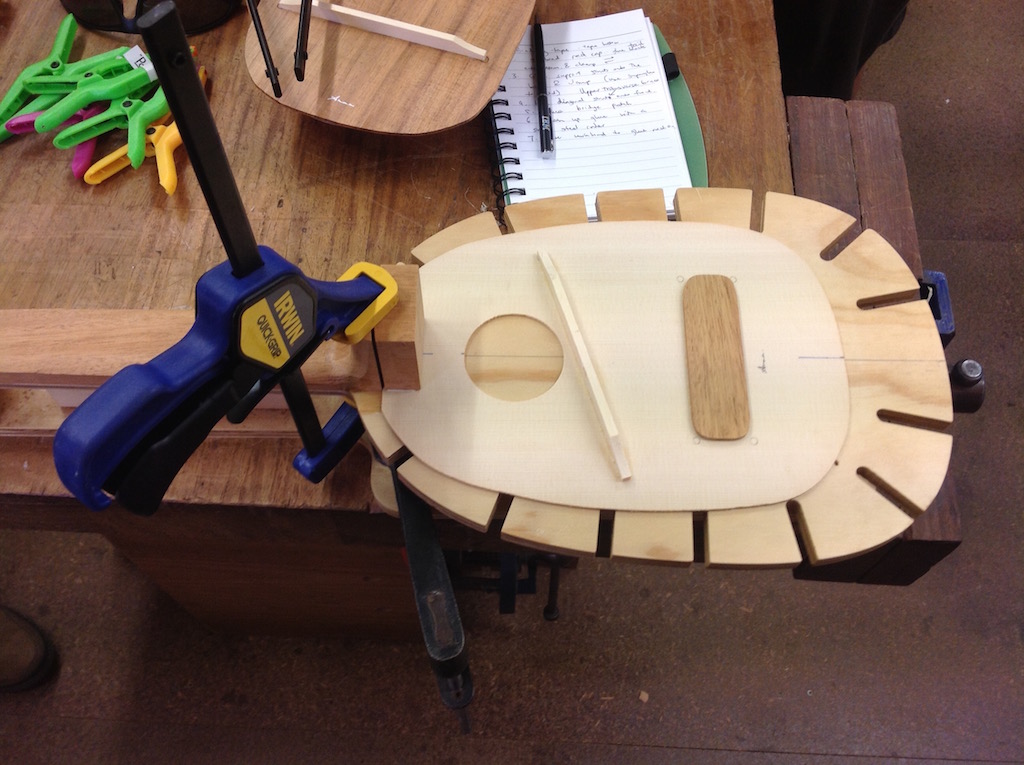
11) Once we are sure they fit, we apply glue all around on the flat side of the sides (i.e the one that was facing down when we glued it earlier). Using a spreader we apply glue into the grooves on either side of the base. If worried about glue squelching out, use brown packing tape on the workboard under the base of the neck. Slide the ends of the sides into the grooves.
12) Clamp all around using the custom spool clamps made from long bolts with wood washers and wing nuts. Only use light pressure - just until they hold in place. Mine kept falling off.
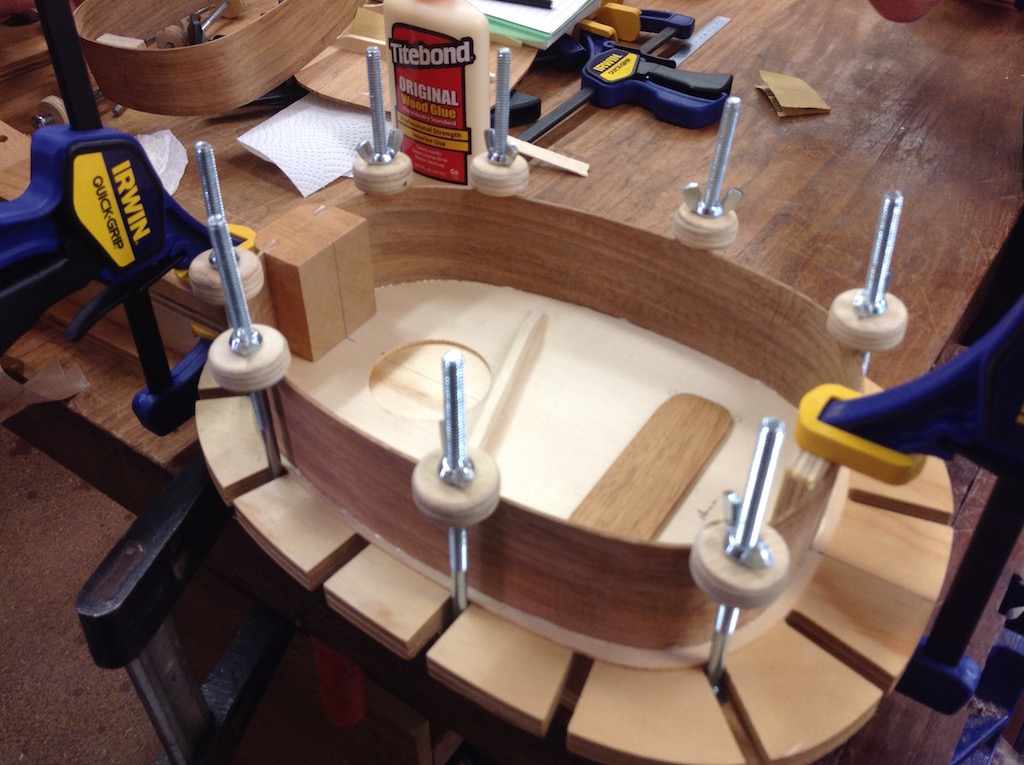
13) While that is drying, sign the custom label and use a glue stick to glue it in place (inside back above the top brace) so that it will be visible through the sound hole.
14) Clean up the glue that has squeezed out around the inside sides using the small steel ruler.
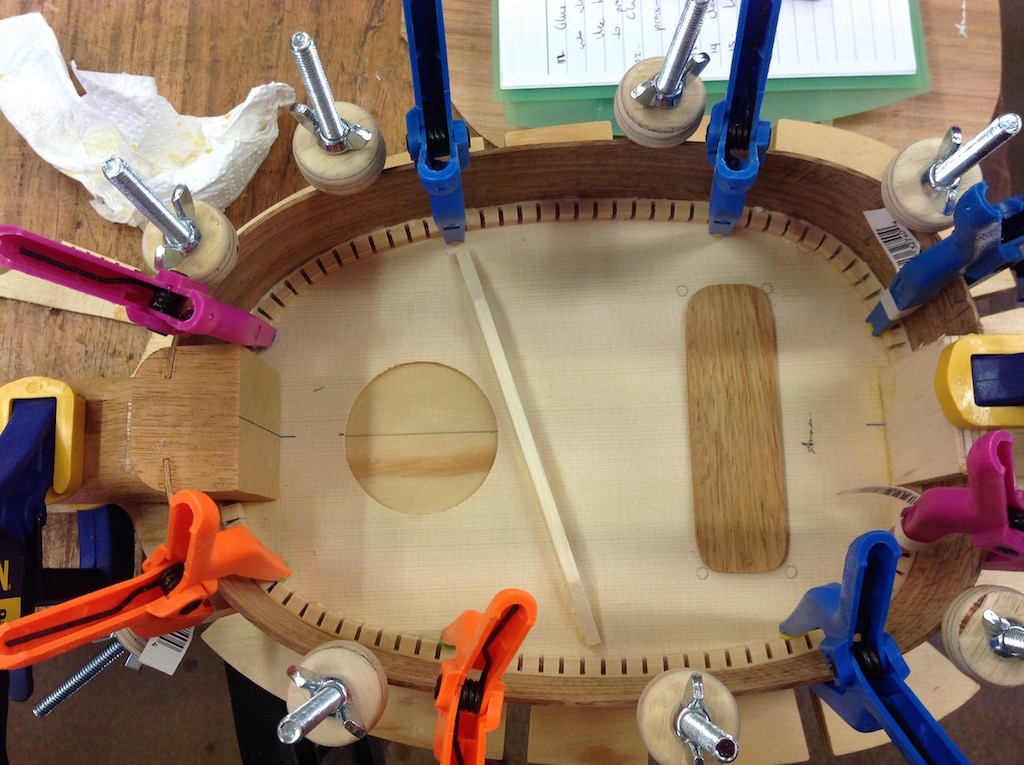
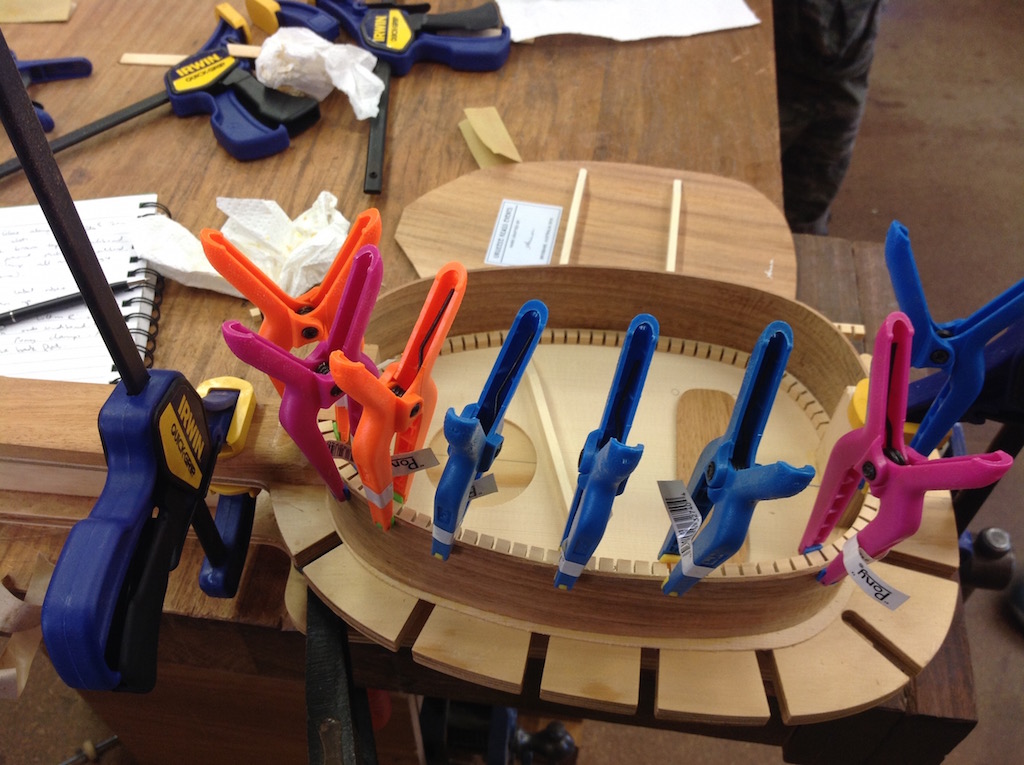
15) Now we attach the linings (These are like a chain of little blocks joined on one side only). Measure by running along inside of each side, and snap off a few blocks to get it to the right length. I snapped off 4 blocks. Apply "just enough" glue to the flat side (that will run along the side) and the smooth side (that will attach to the underside of the top) and spread with finger. Glue in place, making sure that it is pressed down onto the soundboard all around (most important thing!). Use 8 Pony clamps to clamp it all around. We wait around 15 - 20 minutes before we do the same for the lining on the other side (moving the clamps over to the other side). After another 15 minutes or so, I spread the clamps out across both sides to keep things in place while we had lunch.
16) Now we unclamp everything and sand the back flat by dragging it over a huge sandpaper board that is flat on the benchtop. (NB from instructors: This is to ensure we get everything flat and flush to get a good glue joint for the back.)
17) Now we apply Titebond along just the flat side of another lining piece (also snapped to size) and clamp it around at the top of one side (as we look at it, actually technically it is the bottom of the uke, but you know what I mean), so that the top of the lining is flush (or just proud of) the top of the side. This is because we will be gluing the back onto this and it needs to be completely flat. Again we wait and then repeat for the lining at the top of the other side.
18) Using a small brass violin makers' plane (specifically, a Lie-Nielsen 101), shave flat along the edge (to make our sanding job easier). Now drag over the sandpaper board again to sand until it is totally flat.
19) Apply a very thin layer of glue carefully to the tantalones kerfed linings (this is apparently the name for the tiny blocks that comprise the linings) and along the block at the base of the neck, and the tail block as well as along the tops of the sides.
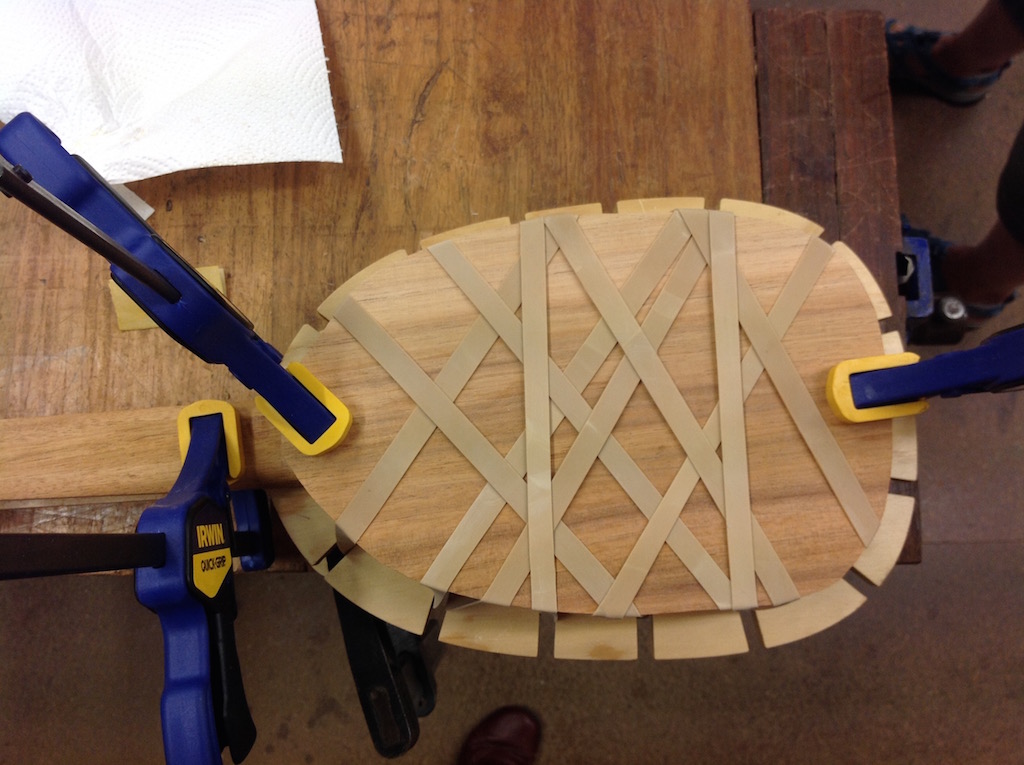
20) Clamp neck to workboard. Carefully place back piece on top of glue and clamp at tail and neck. Now use giant rubber bands, pulling up and then over, to clamp the back on all over, and we are done for the first day.
A beautiful Brisbane thunderstorm was brewing as the class was wrapping up, so I ended up dashing through Southbank parklands, getting completely soaked in the process. Marvellous fun!