I’ve been working with these NodeMCU clones (ESP8266 microcontroller dev boards with integrated wifi) lately. There are a range of ESP8266 dev boards available, with different GPIO pins broken out, different types of antennas (ceramic vs PCB vs socket), and in different sizes, and they are great for small IoT projects because of their small form-factor and low price (between around US $2.50 - $5 each direct from China, depending on the model).
ESP8266 dev boards can be programmed using Lua with the NodeMCU firmware, or using Arduino IDE for ESP8266. Espruino is a JavaScript interpreter that has been designed to run on microcontrollers. Last month, the Espruino team added support for ESP8266 as a target, providing JavaScript an alternative for developing programs to run on these devices.
To use Espruino to write programs using JavaScript for ESP8266, the Espruino firmware needs to be flashed to the ESP8266. Download the firmware files from https://github.com/espruino/EspruinoBuilds.
You'll need both espruino_esp8266_board_0x00000.bin and espruino_esp8266_board_0x10000.bin.
The ESP8266 12E dev kit boards have USB serial built in. For other dev boards, you will most likely need to use a USB TTL Serial cable or module. First make sure the driver for the USB Serial chip is installed. This might be an FTDI, CH341 or CP2102 USB to UART driver depending on your hardware. My v 1.0 NodeMCU devkit board uses the CP2102 chip. The driver for Mac OSX is available here.
To put the board into flash mode, GPIO 0 needs to be connected to ground. My board has a convenient flash button (on other boards you may have to wire up the pin to ground manually). To put it into flash mode, hold down the flash button while plugging the USB cable in. On a Mac, the device should will show up as something like /dev/tty.SLAB_USBtoUART (Except on my machine, where it confusingly identifies the port as /dev/tty.Fitbit).
Download esptool (python script) and run the setup script to install it (Optional if you want to erase the flash). You'll also need to download the build helper tool
Erase the flash by running the esptool.py command from the Terminal (using whatever port your device shows up as)
esptool.py --port /dev/tty.SLAB_USBtoUART erase_flash
Then use the build helper tool to write the new firmware files
esptool -cp /dev/tty.SLAB_USBtoUART -ca 0x00000 -cf espruino_esp8266_board_0x00000.bin -ca 0x10000 -cf espruino_esp8266_board_0x10000.bin
Once the board is flashed, we are ready to run some Espruino programs. Install the Espruino Web-IDE Chrome plugin and launch the app from the apps page in the Chrome Web browser.
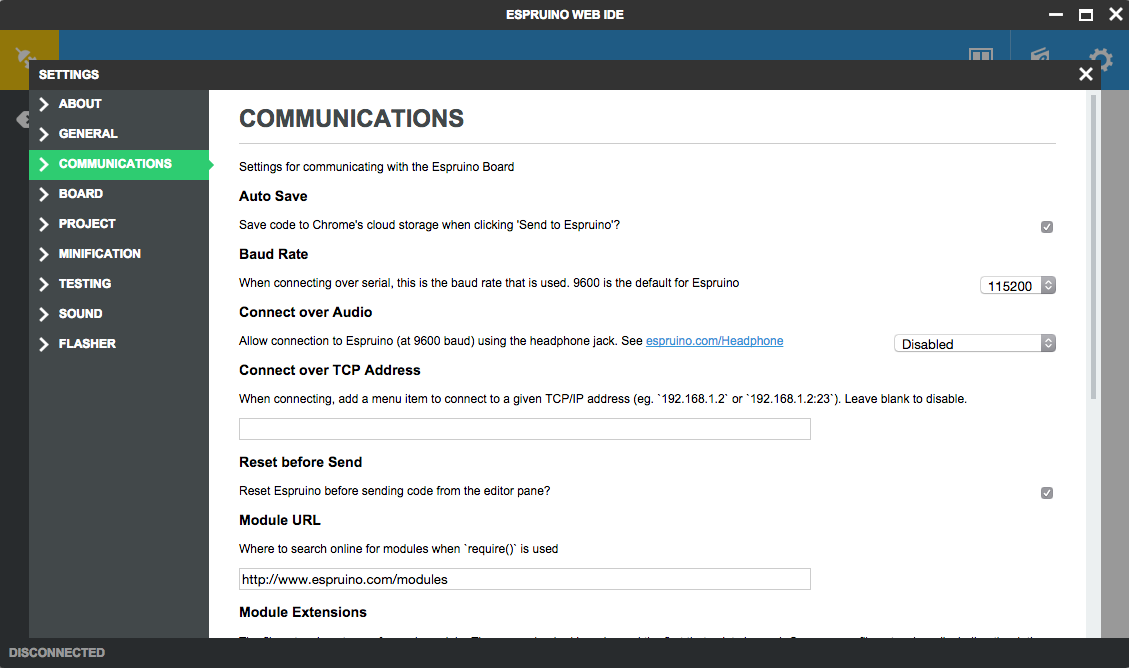
Click on the cog in the top-right of the IDE to go into the settings and change the baud rate (under the Communications category) to 115200.
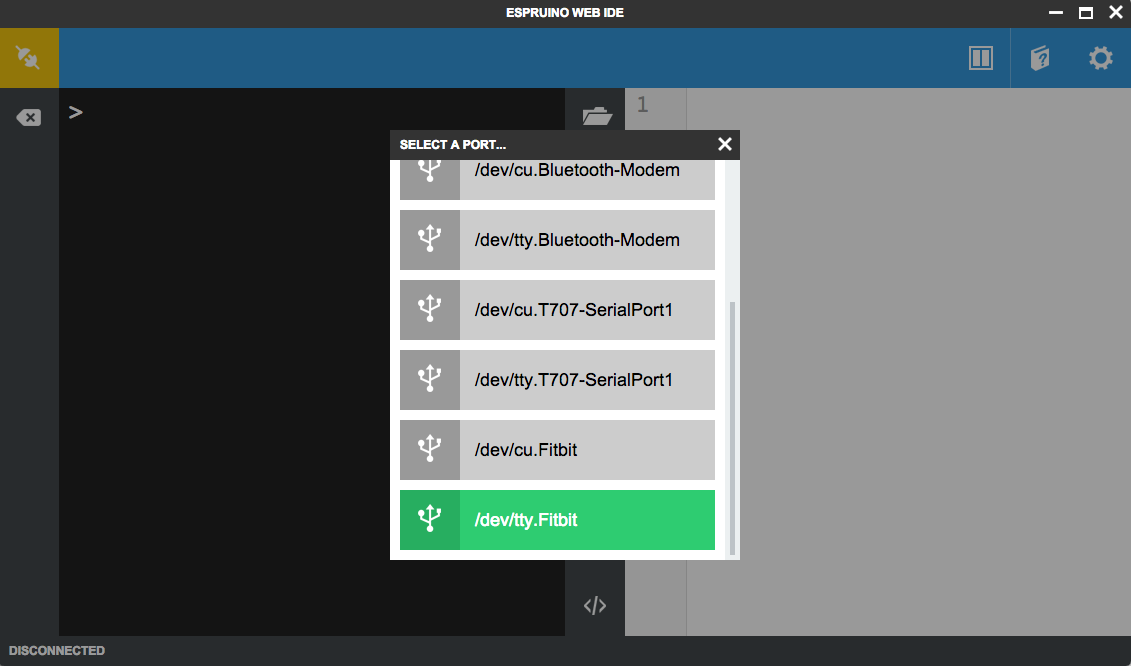
You can reset the board after flashing (by pressing the reset button), or just unplug and plug it back in to your computer USB port. Now you can click on the yellow button at the top-left of the IDE and select the port for your device to connect it to the IDE.
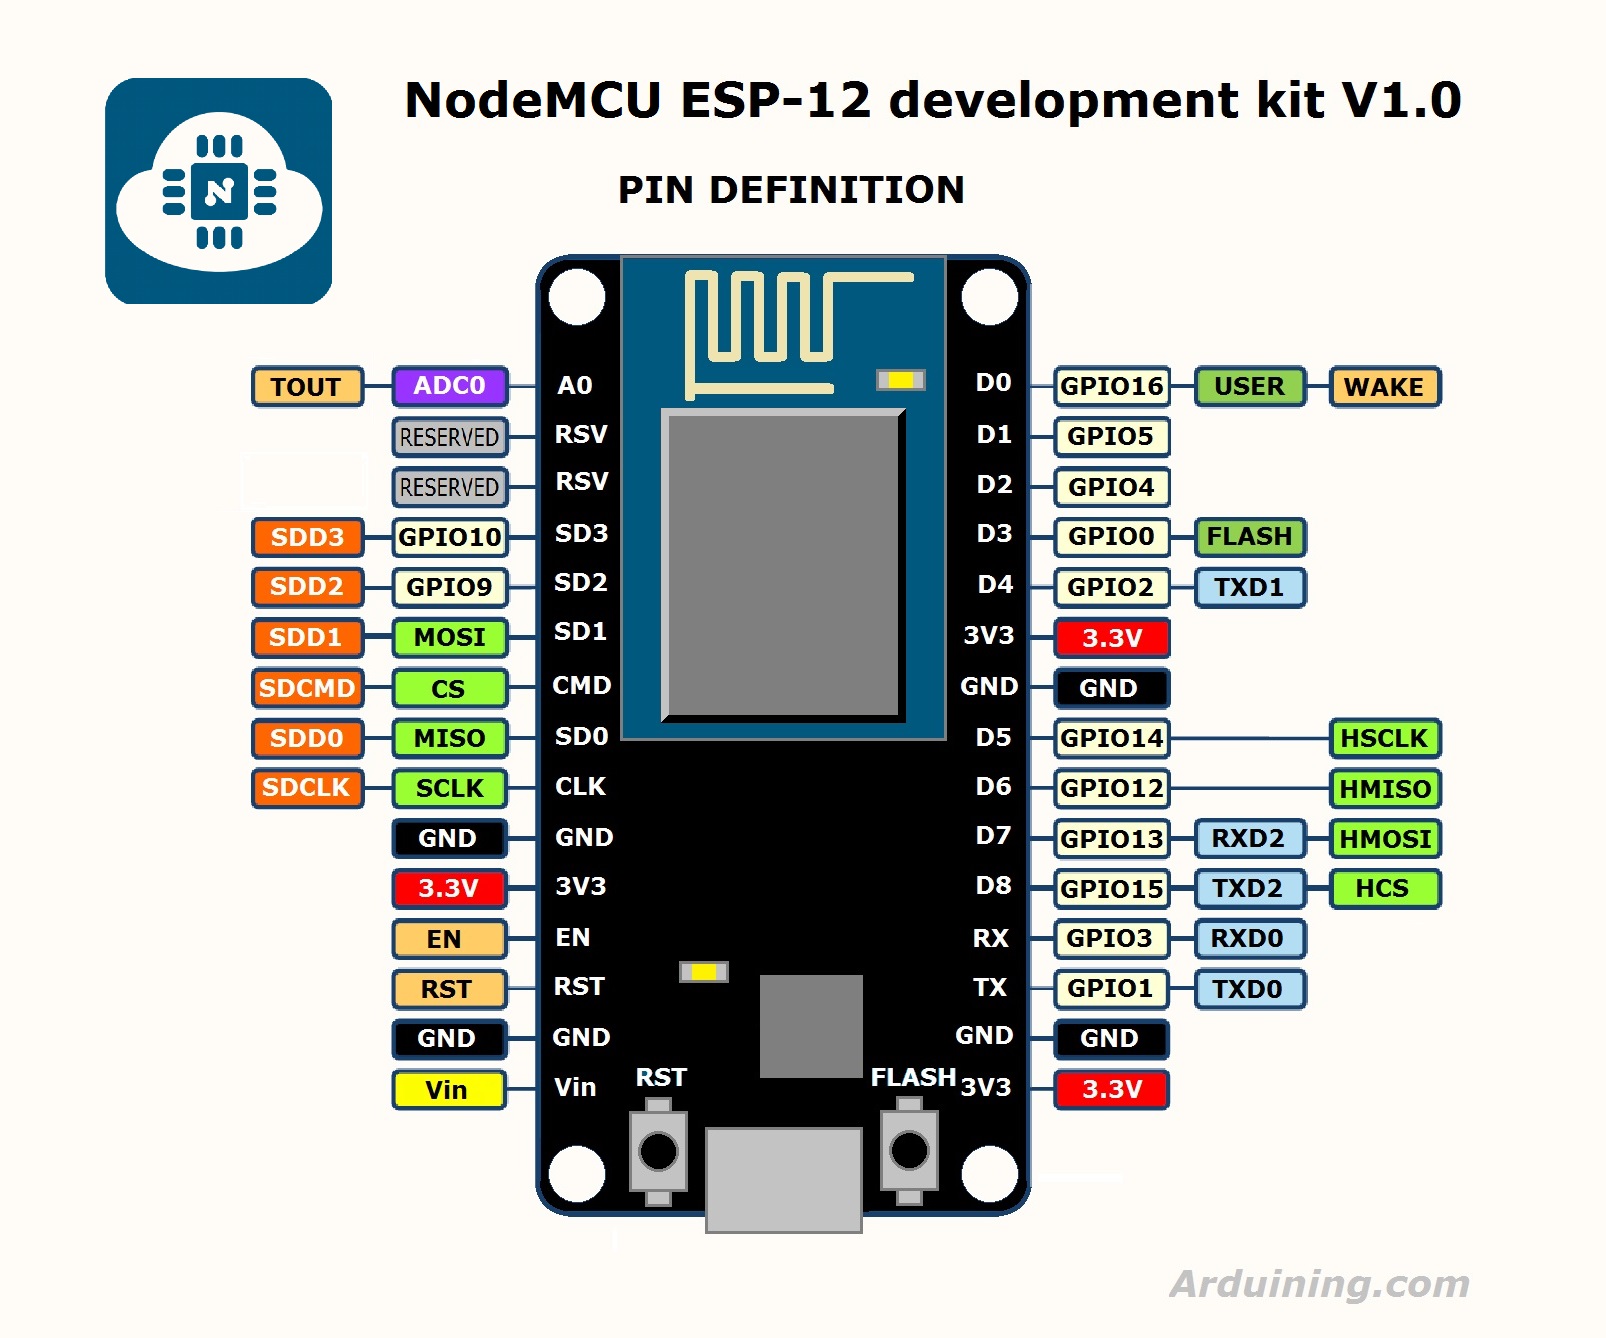
One confusing thing about using Espruino with the ESP8266 is that the actual GPIO pin numbers don't match the labels on the board. Use this handy diagram from Arduining to find out the pin numbers that you'll need to use in your code. E.g. if you are using the pin marked "D2" you'll want to create a pin on GPIO 4 in your code:
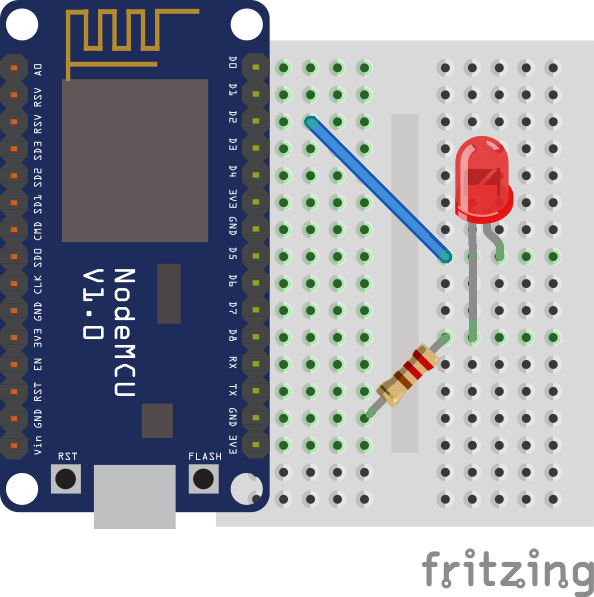
You can enter your program in the editor panel and click on the 'Send to Espruino' button to run it. Here's some code to blink an LED connected to pin "D2" (i.e. GPIO4):
var led = new Pin(4);
var toggle=1;

setInterval(function() {
  toggle=!toggle;
  digitalWrite(led, toggle);
}, 500);
You should see the LED connected to D2 blinking:
You can also try this with pin 2 to blink the tiny onboard LED if you don't want to wire one up.
Check out the Espruino Reference docs for details on the JavaScript functions that are available within the IDE. You can require Espruino modules to extend the capabilities of your program (as well as some modules from npm, but beware this only works with some modules e.g. those that contain a single file). You'll find you'll quickly run out of memory importing too many modules, and not everything works 100% with the ESP8266 board yet.
You can keep track of progress on this new port via the Espruino Forum and Gitter chat room.