I've been wanting to design my own ball jointed doll (BJD) since building my first BJD from a kit about 9 years ago. I'd poured over the Yoshida Style Ball Jointed Doll Making Guide, and I had a pretty good idea of the doll I wanted to make: a child-sized pixie / troll doll about 10 - 15 cm tall.
Initial attempts:
First, I tried sculpting my doll using Sculpey clay. Sculpey is a smooth, polymer clay so you can get some great detail, but having to bake the parts makes the prototype cycle a bit slow (I couldn't squeeze in a few minutes of prototyping in the evening after work, I'd have to set aside enough time to sculpt and bake and cool and clean up etc...). After baking, the parts were quite delicate so they sometimes got damaged when I tried to test out the joints. Breaking a part you've just spent an hour sculpting is not fun :( Sculpey is also pretty expensive here in Australia, and I was going through a lot of clay trying to refine my design over several iterations.
I then tried prototyping using paper clay. Paper clay air dries, which avoids the baking step, but it dries out super fast in the hot dry climate here in Brisbane, Australia, and it's pretty messy to work with, so the results never matched my expectations and it still required quite a bit of a time commitment to do any prototyping. However, it is much more cost effective for prototyping than Sculpey: If you are looking for a cheap source of paper clay, it's $2.80 for 500g at DAISO. Here's a video describing how to get started with sculpting a BJD using paper clay:
3D Sculpting
Eventually, I decided that digital models are much more forgiving than clay, so I started sculpting the doll in 3D, with the aim of printing it on my 3D printer.
I'd always had trouble getting the proportions right in the dolls that I'd sculpted from clay. Make Human is an open source tool written in Python, which is designed for generating human models e.g. for games and animations, and the models created using Make Human are CC0 licensed (i.e. public domain). So, I figured it would be a good way to generate a base model from which I could create my doll parts.
Make Human's interface reminded me of the old Second Life avatar customisation interface - you start with a "generic" caucasian male model and then you can tweak various aspects of the appearance, for example the size, spacing and angle of facial features, limbs, height, body shape etc. So I played around with the settings until I had a base model that was pretty close to size and shape for the doll I had in mind and exported to an obj file ready to import into 3D sculpting software.
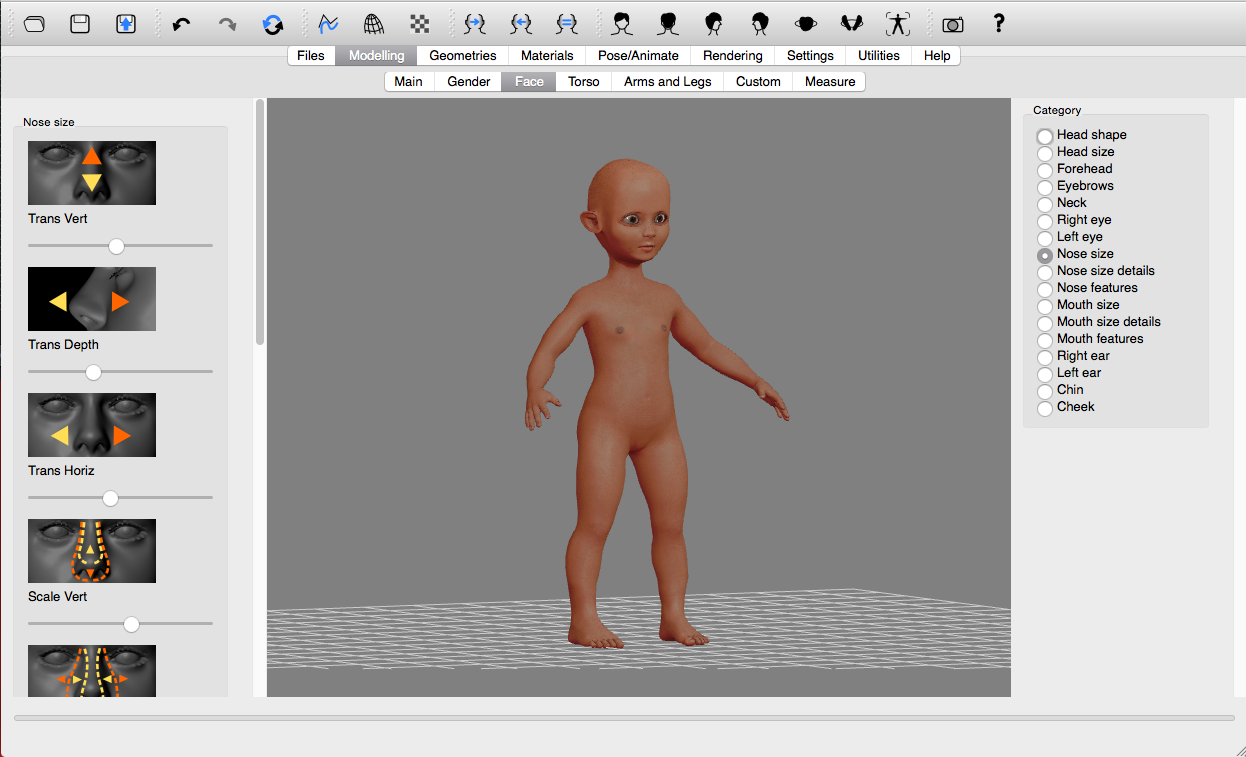 Creating the base model with Make Human
Ball Jointed dolls are strung together using elastic, with balls at the ends of the parts providing the degrees of freedom for each of the joints. So I needed to slice up my human model into pieces corresponding to the parts of the doll: head (2 parts), body (could also be split into parts but I decided to keep it as one), feet, shins, thighs, hands, lower arms and upper arms. Then I'd need to add the balls for the joints, hollow the parts out where the strings pass through, and prepare them to be suitable for 3D printing.
I'm on a Mac, so I was looking out for an affordable and accessible (to beginners to 3D sculpting) 3D CAD program that would run on Mac OSX. I'd seen some tutorials for Autodesk's free Meshmixer software. I liked how intuitive it looked to slice up a model and merge multiple models into new shapes.
The first thing I did after importing my human model into Meshmixer, was to use the slice tool to cut the model into parts and save them in separate files. Using the brushes to sculpt the surface of the 3D model is conceptually similar to sculpting with clay, so it was pretty easy to get my head around how to make the tools do what I wanted. The new shapes for the joints and sockets can be created as separate shapes and then joined with or used to subtract from the existing parts (using the difference tool).
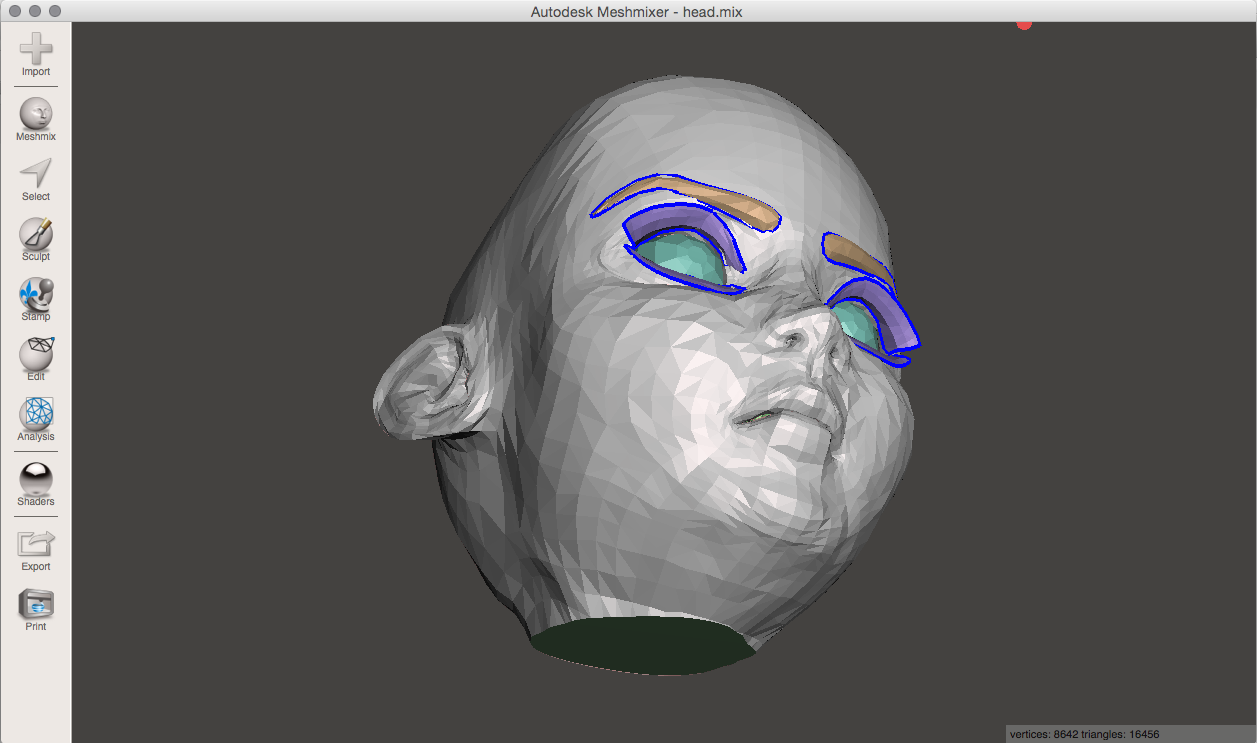
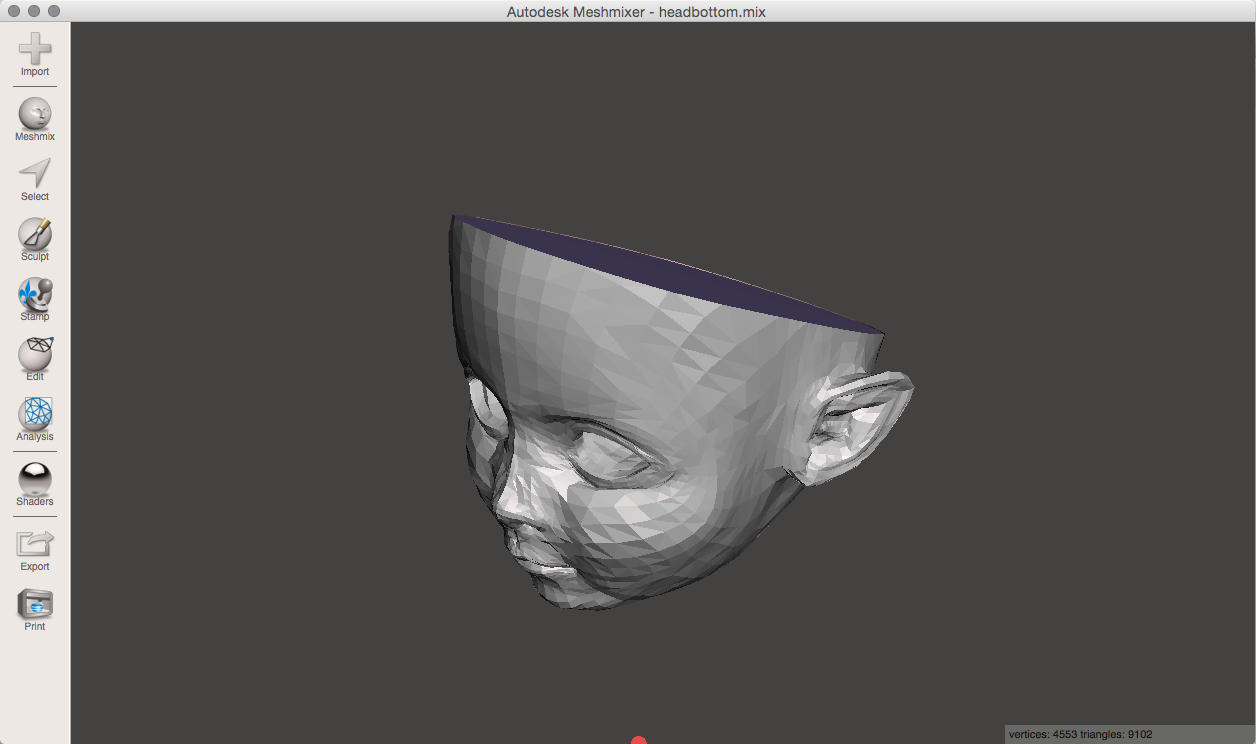
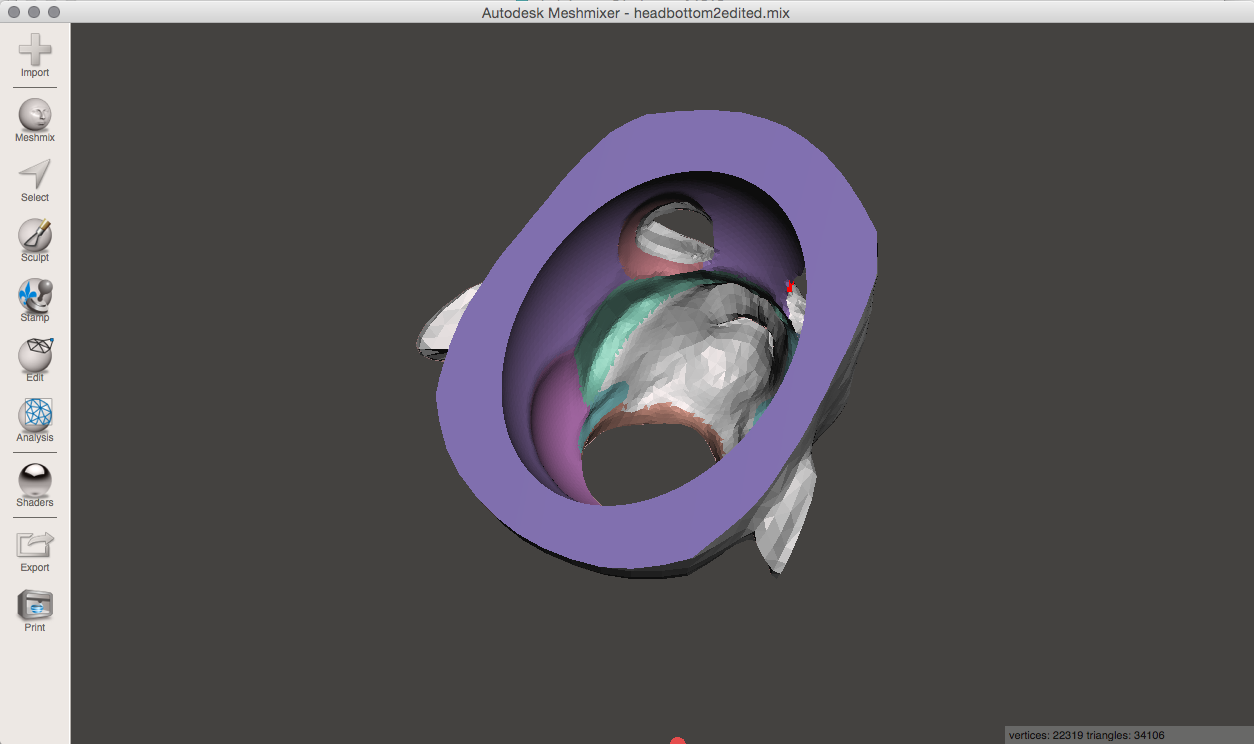
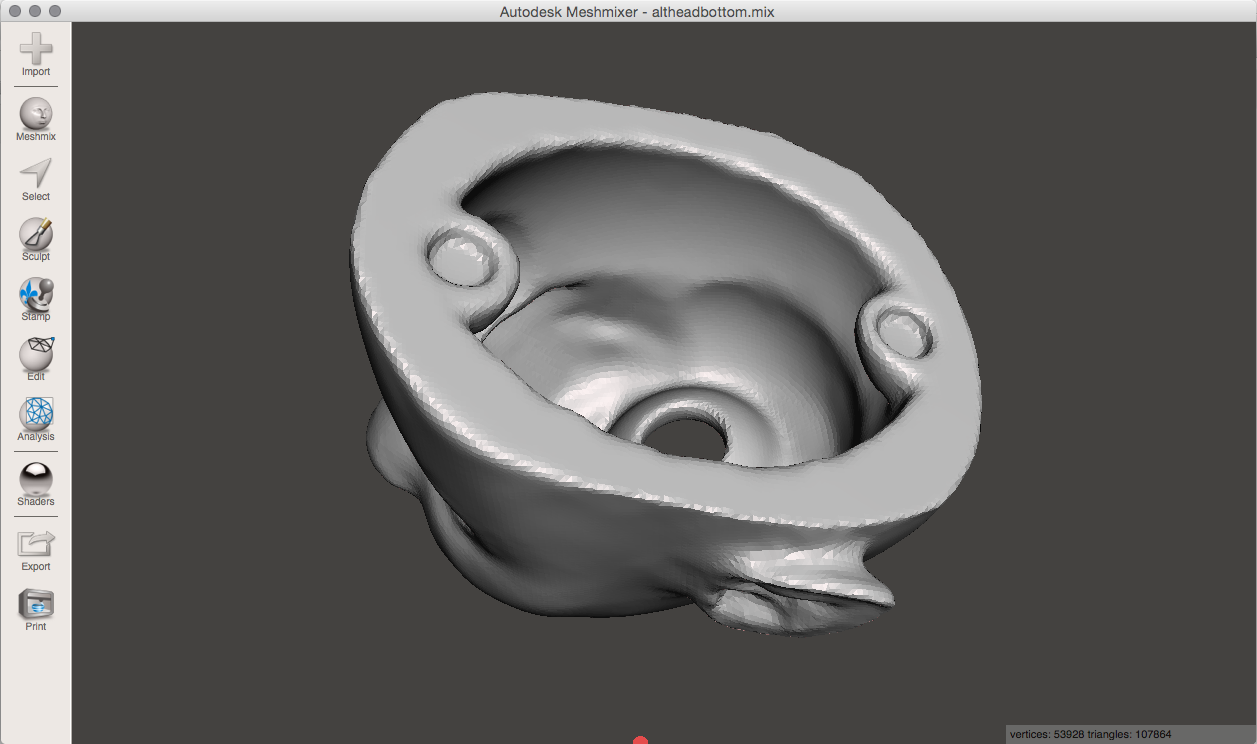 Sculpting the head with Meshmixer
I started with the head. It needed to have the unnecessary (for dolls) parts created by Make Human - eye balls, eyelashes, eyebrows, tongue - removed, and the crown sliced off to provide access for changing the eyes. Both the top and bottom of the head needed to be made solid and then hollowed out, and the eye sockets made bigger to accommodate doll eyes. A socket to go on top of the neck also needed to be added at the base (with a hole to allow the strings from the body to pass through where they are tied off inside the head). I also made some changes to the facial features (I sculpted 2 different faces for two different doll characters). Finally I added some mounting points where I'd be able to glue small magnets onto both head parts to hold the parts together. I also had to turn each part into a solid part suitable for printing.
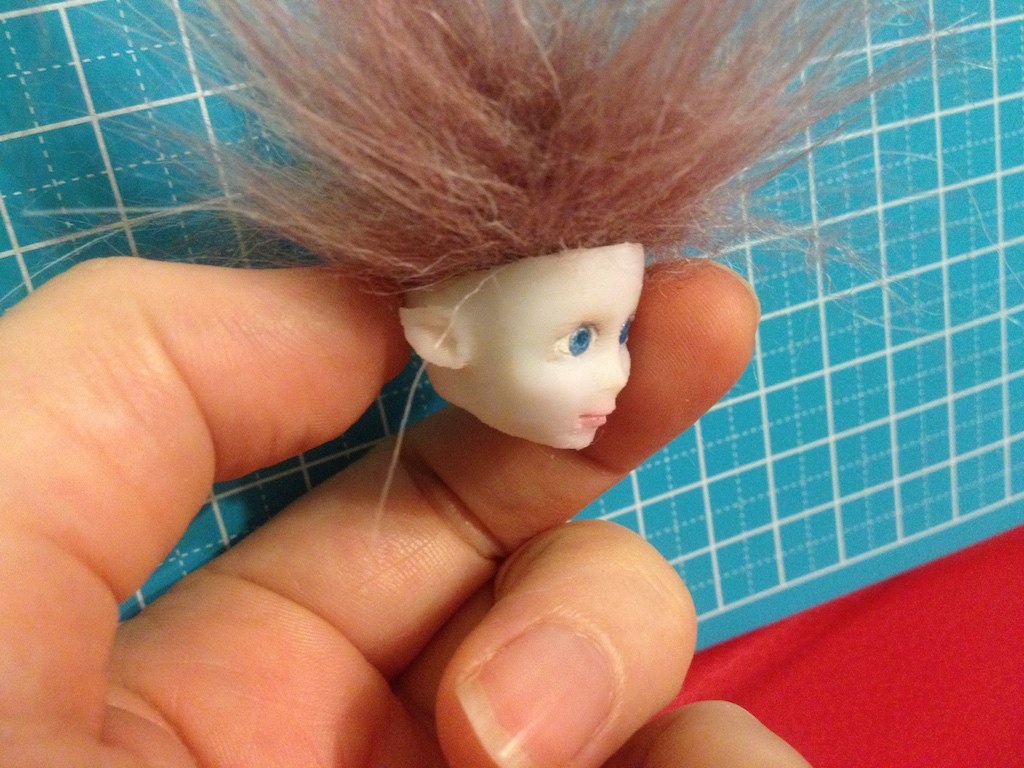 My very first 3D printed prototype doll part, printed in February at the Makerspace at The Edge because my printer at home was out of action at the time. Scrap of faux fur for a wig and 2-minute faceup done with watercolor pencils with eyes made from glass seed bead irises with paperclay pushed behind them.
One thing I learnt to do quite early in the sculpting process was to save often, and keep multiple revisions of my file because Meshmixer crashed a lot. Maybe this was because I was working with models with a lot of polygons. It usually happened when I was trying to merge models. It also managed to corrupt files a few times, so I'd save the file, and when I came back to open it later, I'd get warnings about the file being corrupt. When that happened, I exported the file to obj and then reimported from the obj file, and the warnings would disappear.
I've described this process as though it occurred as a continuous session, but in reality this took place in small snatches of time over several months. I created the initial parts without the neck socket, magnet mounting points etc and printed just the lower half of the head to check the scale. The first prototype was too small, but its adorable little face was so much closer to the image I had in my mind than anything I'd been able to sculpt with clay. I gradually refined the head over time, all the while getting more familiar with how to sculpt with Meshmixer.
 Evolution of the model
Part two will look at designing the joints for the body parts and how the doll came together.