This post is part of a series relating to maker kits that I prepared for the HSBNE booth at Supanova 2016.
If you are handy with a needle and thread, the Sewable Circuits kit is perfect for adding LEDS to costumes or accessories. These LEDs are great for minimalist lighting where you need single color lights to turn on or off - if you want programmable, colorful LEDs, check out the neopixel ring project.
Kit Contents
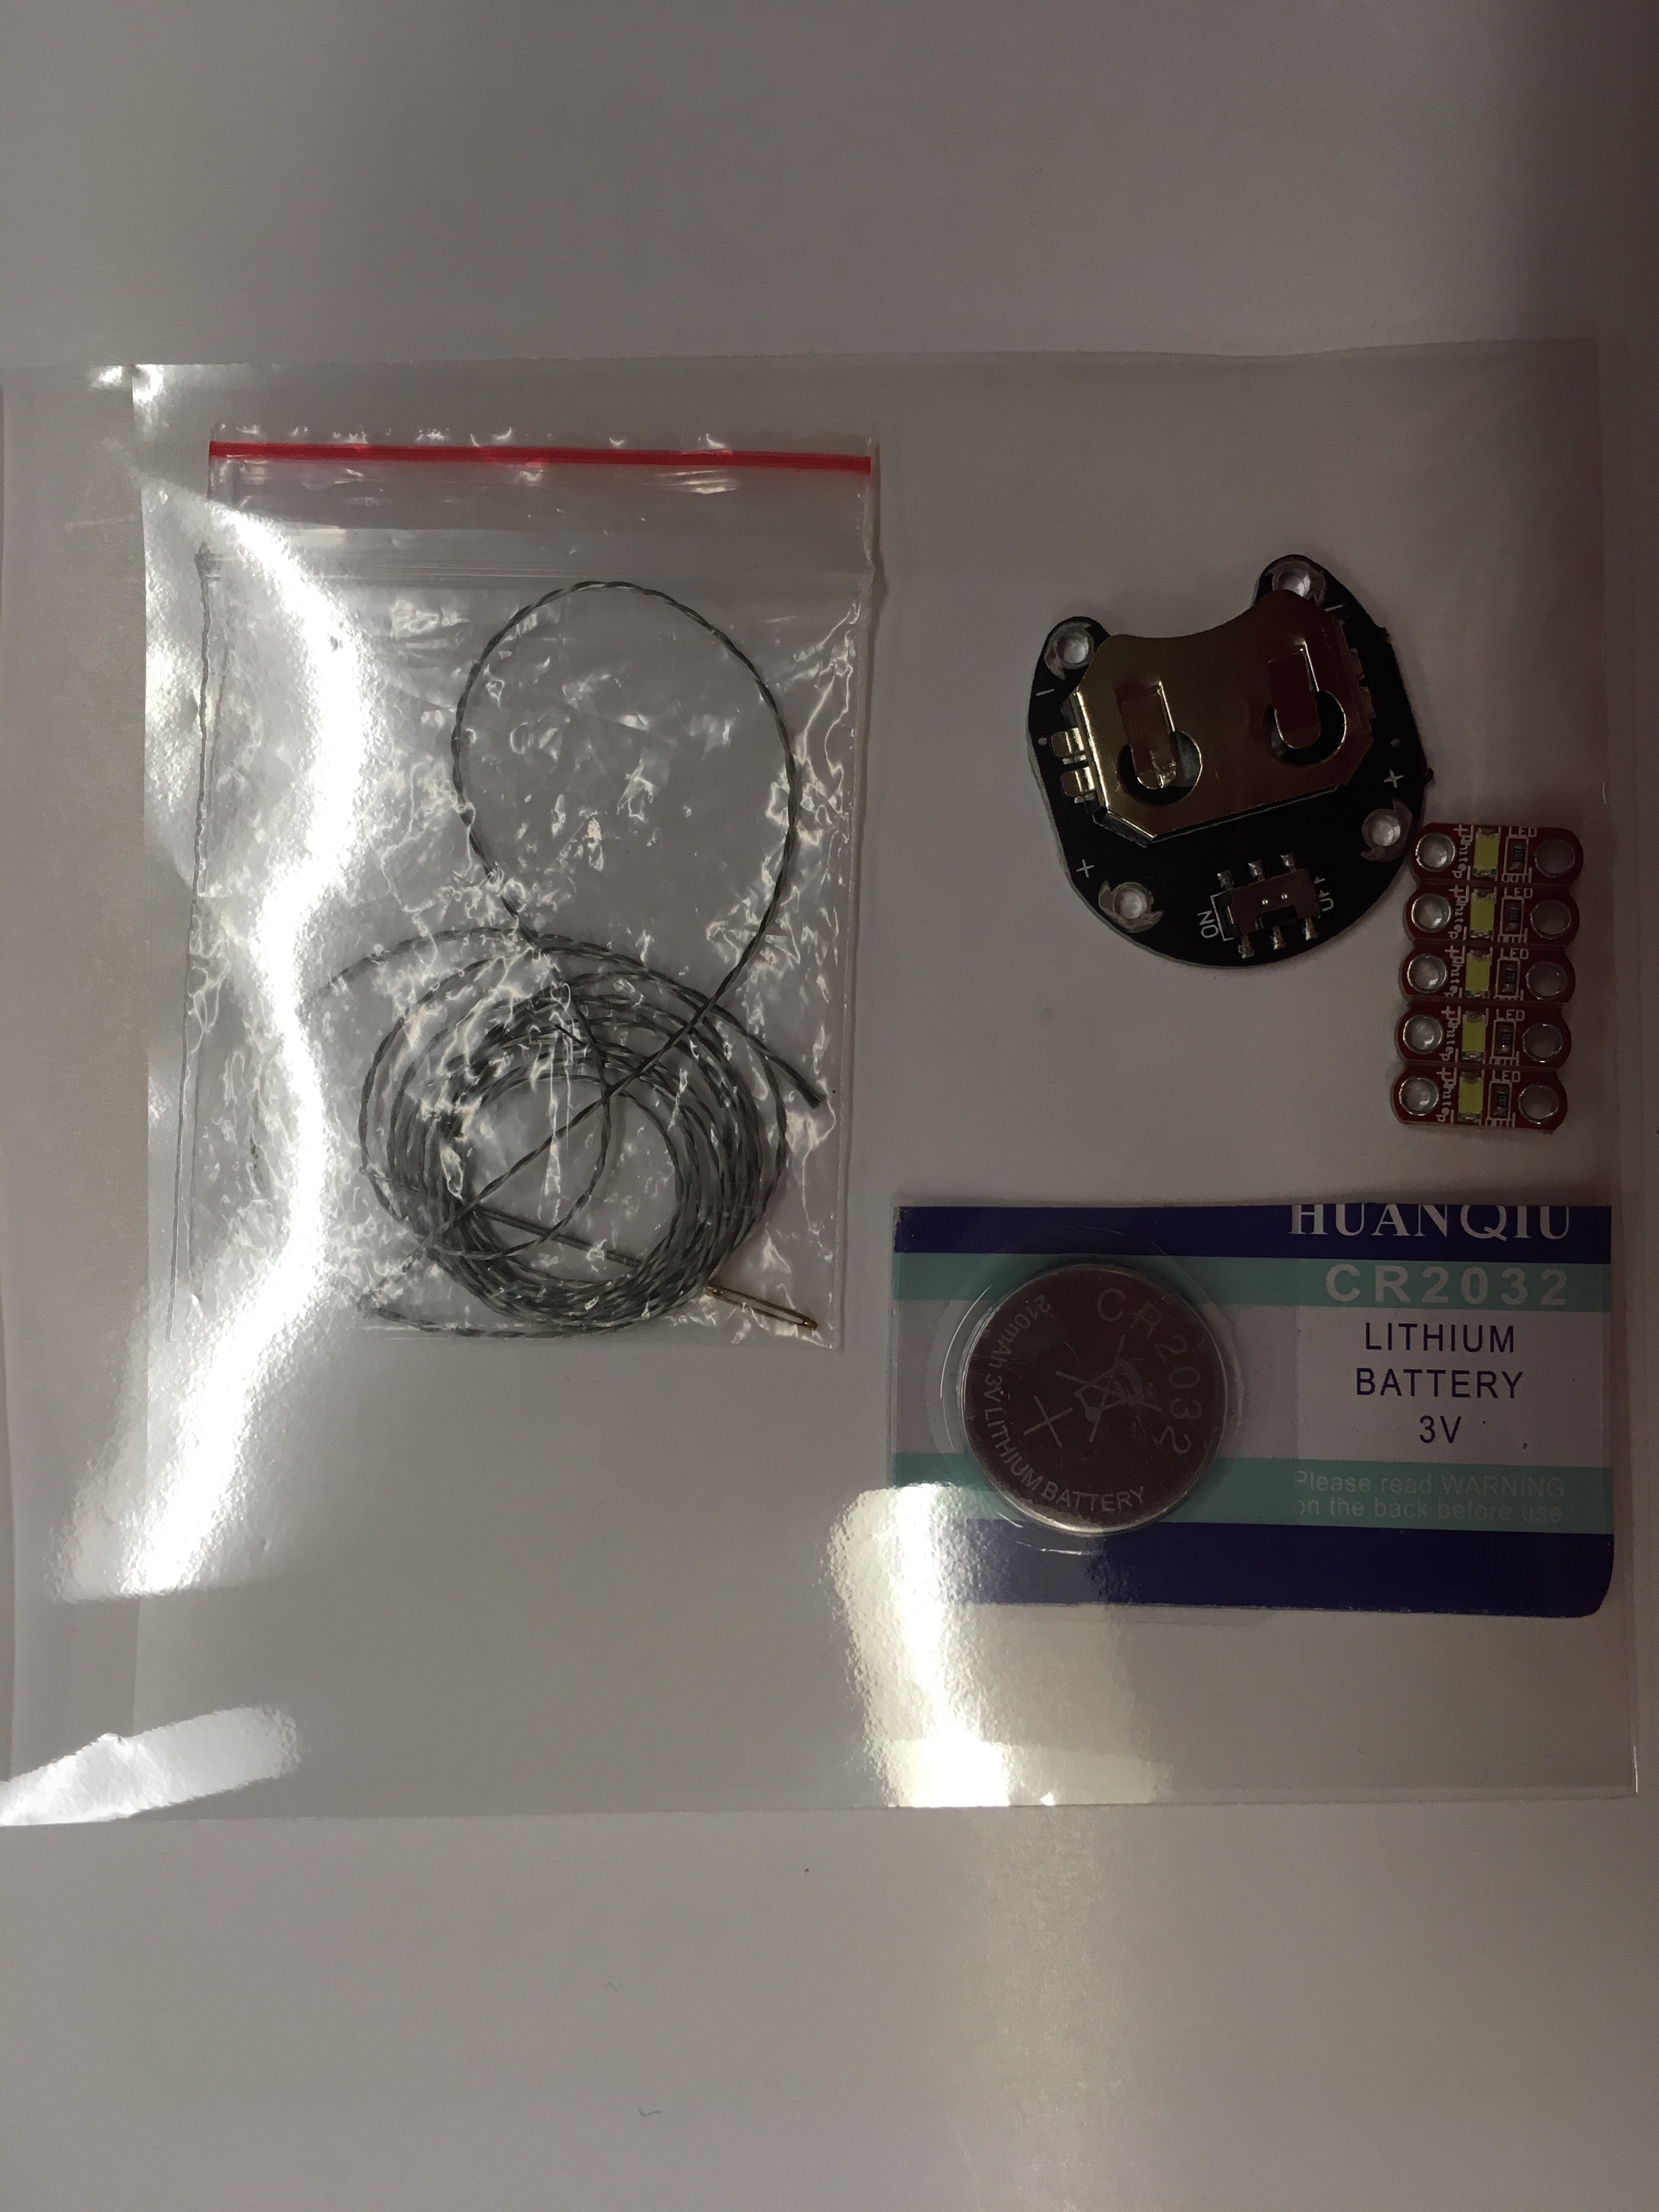
- 3V sewable battery holder with switch
- CR2032 coin cell battery
- 5 x sewable LED "sequins"
- 1 meter of conductive thread
- needle
Need some inspiration? Here's a project idea from Adafruit - make an LED bowtie. Because bowties are cool...
Tips
You may want to dab some clear nail polish or craft glue on your knots to keep them secure.
You can paint fabric paint over your conductive threads when you are done to prevent accidental shorts.
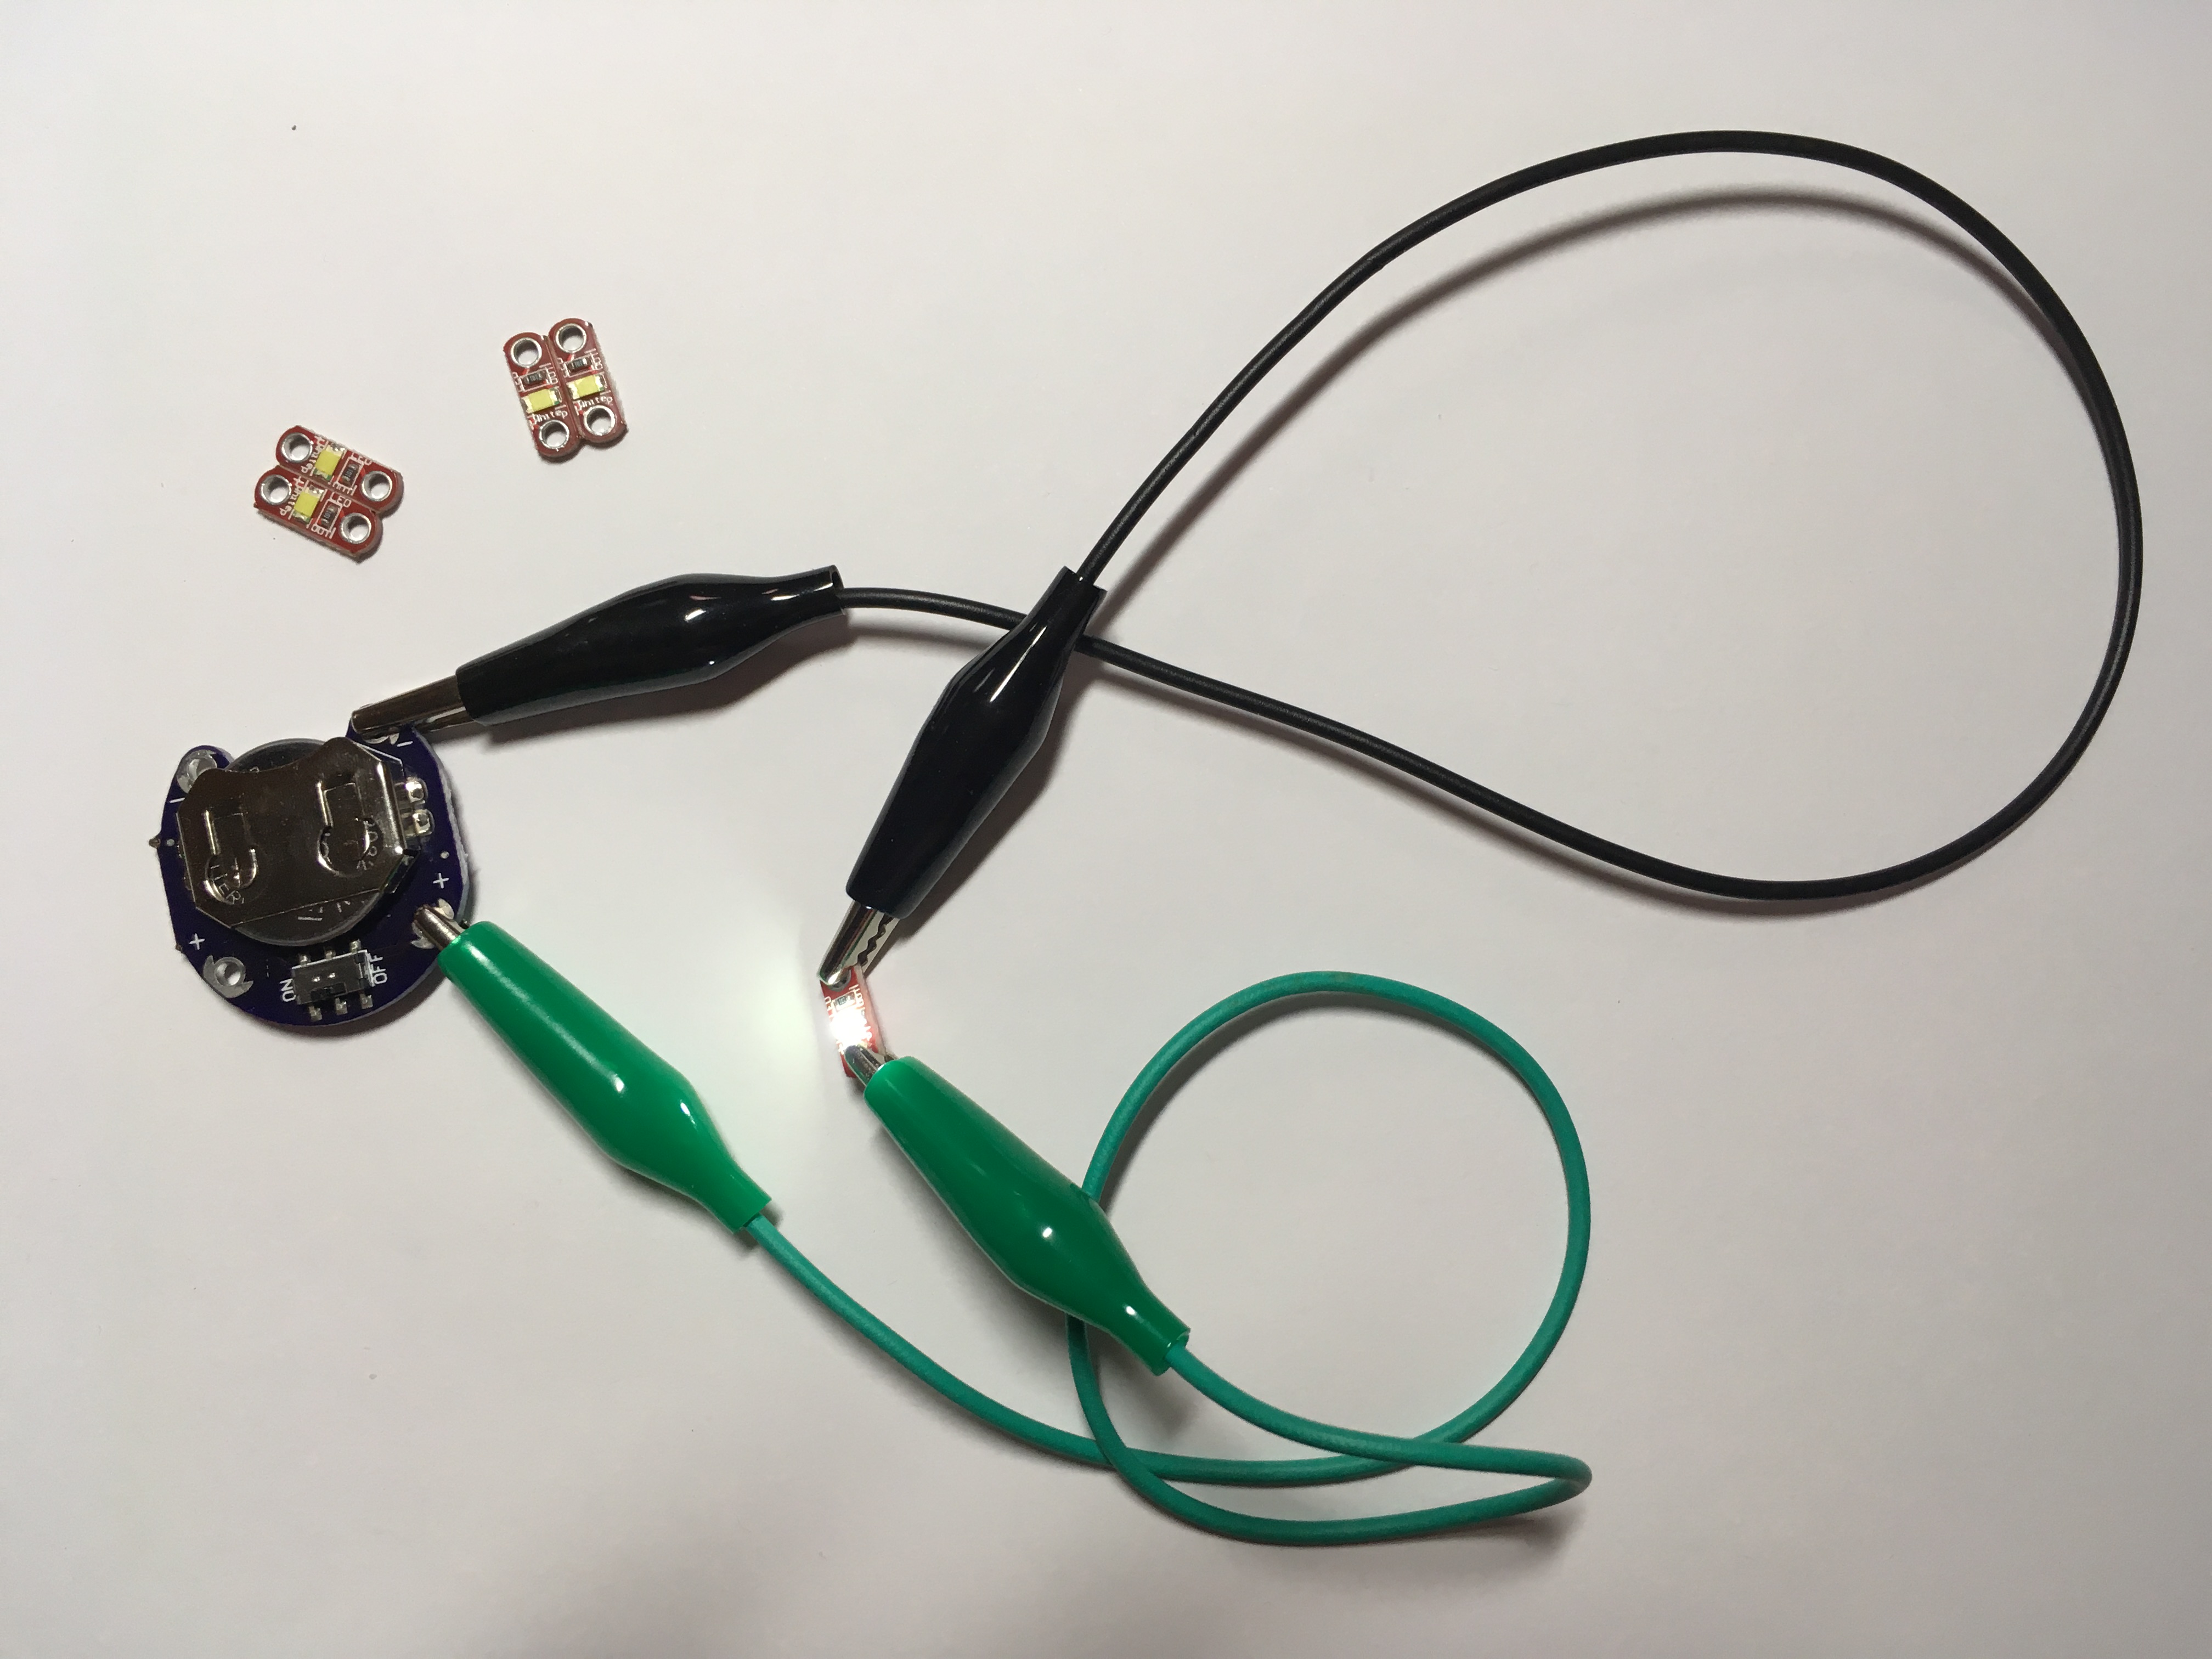
You can use alligator test leads for prototyping and testing out your LED placement. You can find these in most electronics stores.
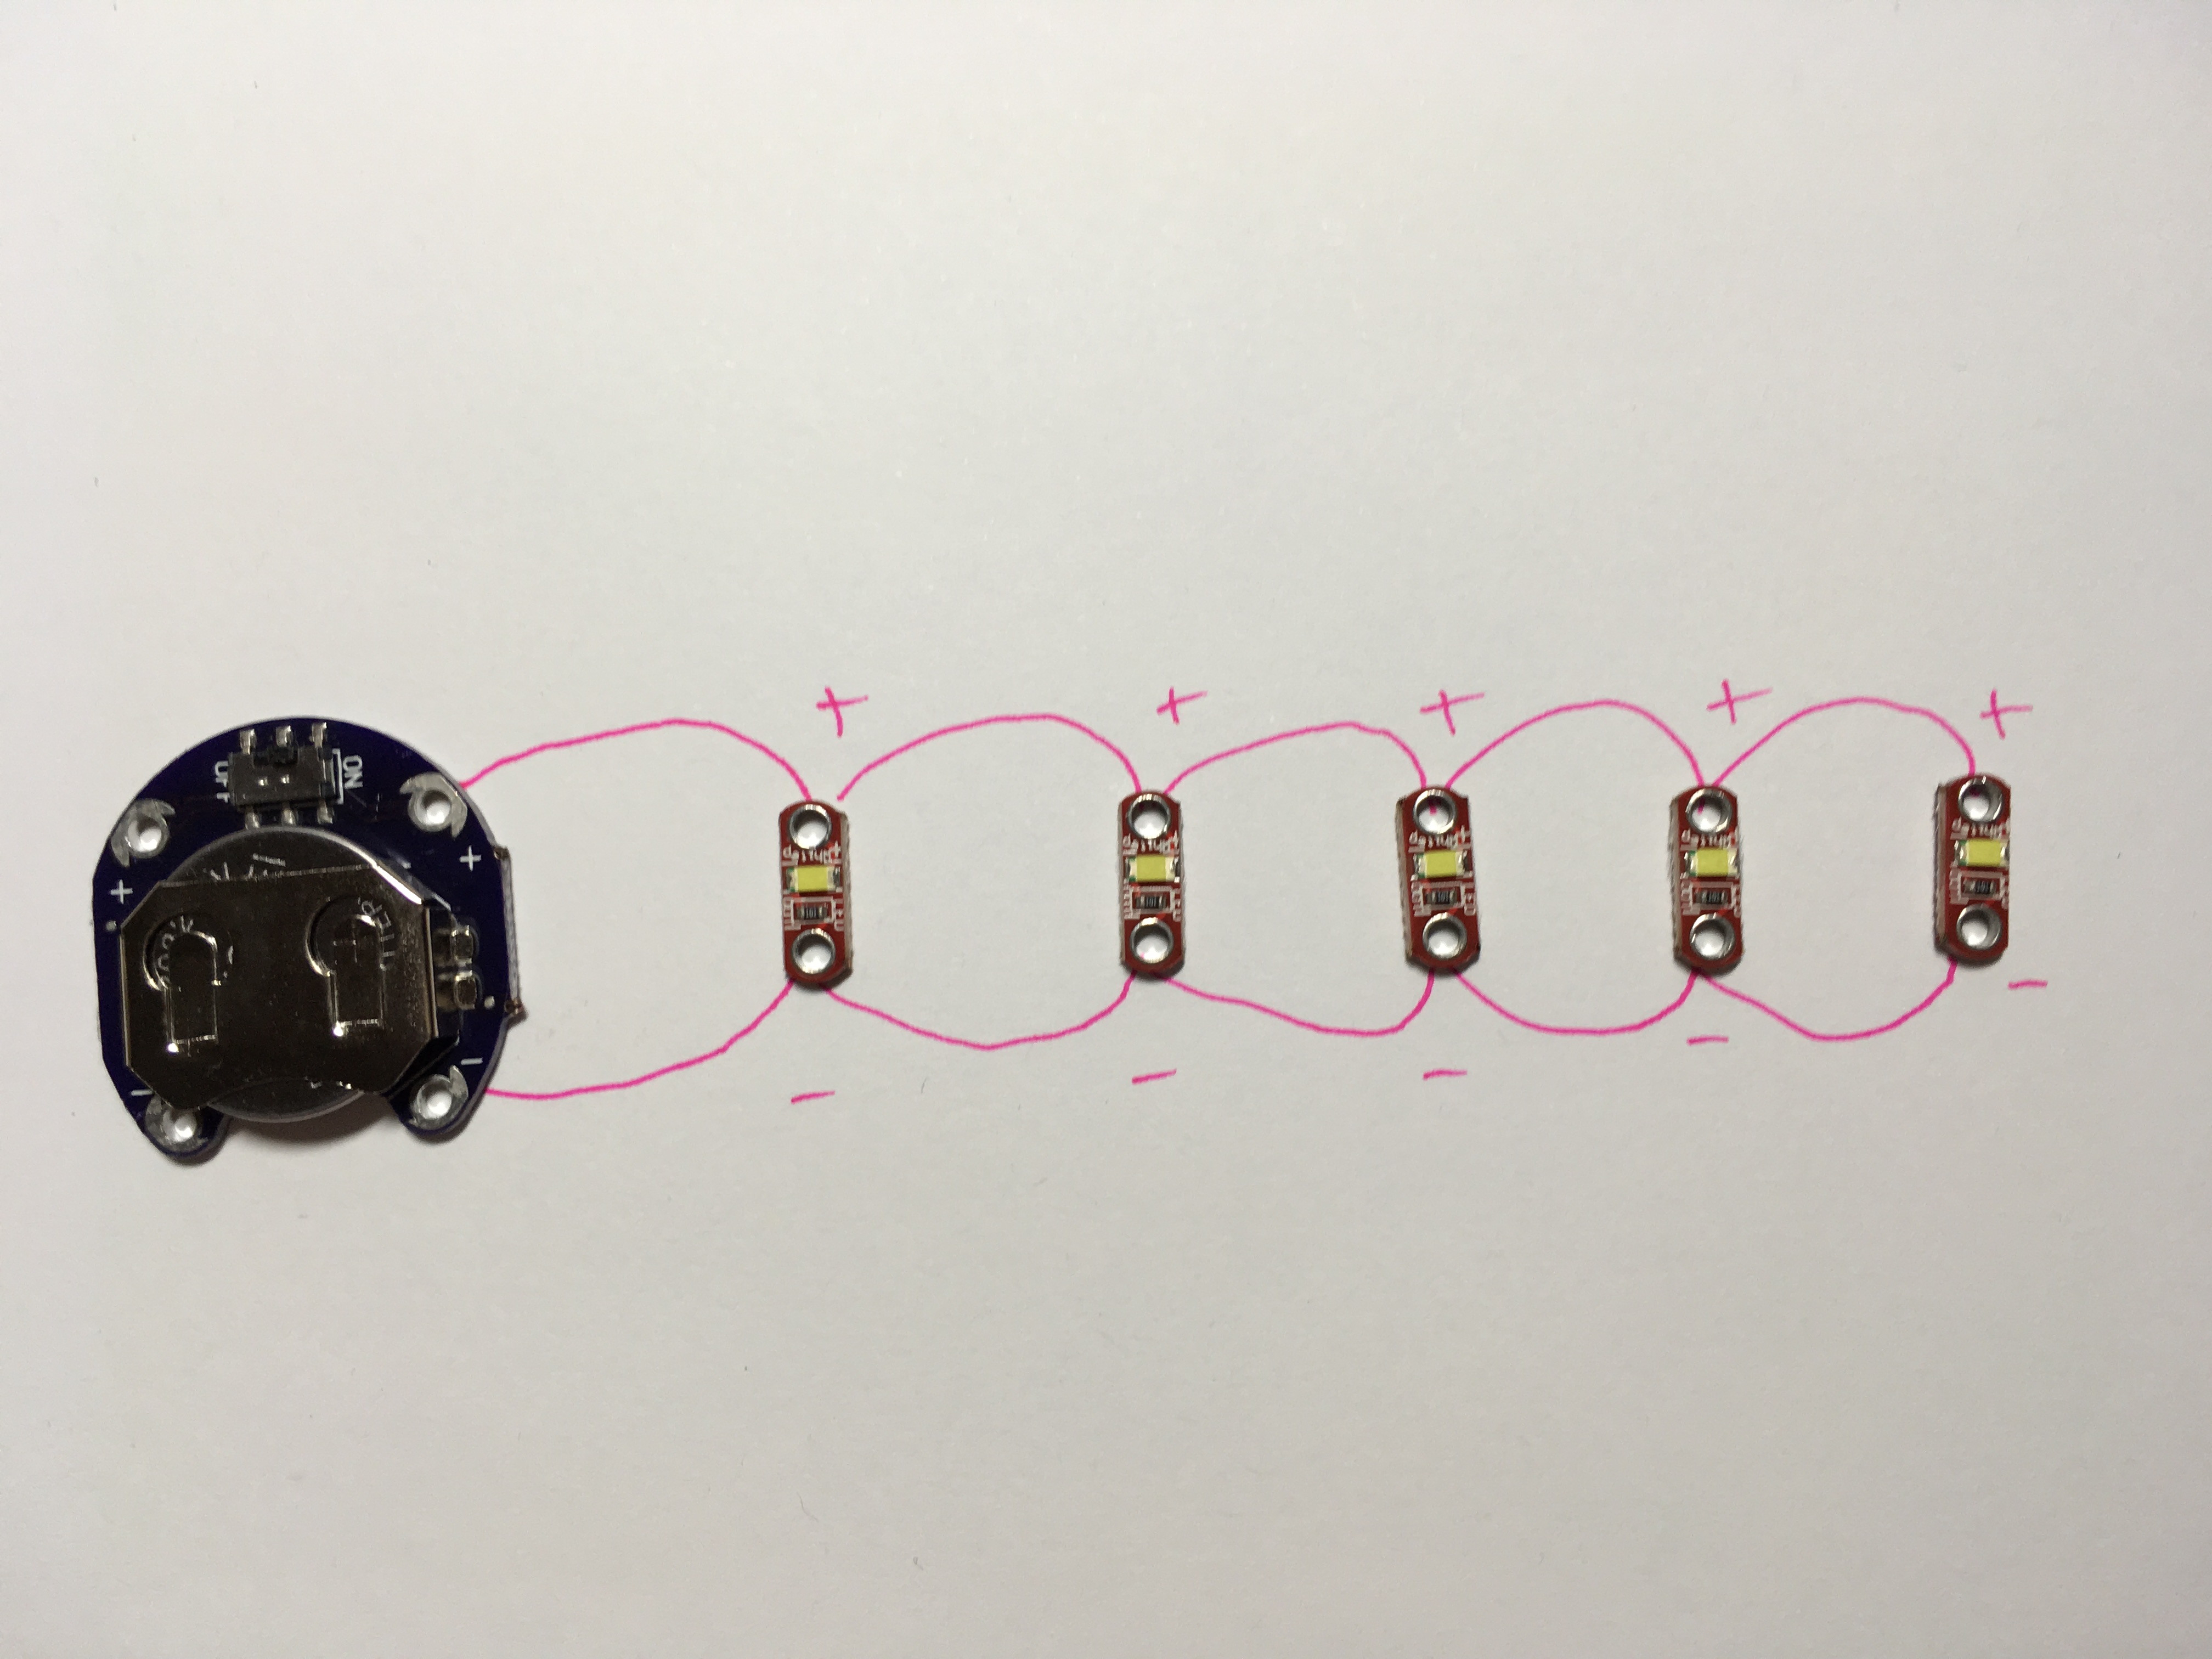
- LEDs can be connected in series or parallel. Parallel is usually the best choice for costumes where you want the LEDs to be the same brightness. Here's a parallel circuit:
Assembly
Decide where you want to put the battery holder. Inside a pocket or tucked inside a waist or neck band are good places to hide it from view. You'll need to keep the conductive threads short, so don't put it too far away from where you want the LEDs. Starting at the positive (+) terminal, tie the conductive thread onto the battery holder, then use a couple of stitches onto the costume to secure it in place.
Now stitch with the conductive thread to the position where you want the first LED. Conductive thread has a lot of resistance so take the most direct route.
Tie the thread onto the anode (+ terminal) of the sewable LED, loop the conductive thread through the hole a few times and then use the conductive thread to stitch the LED onto the costume. Make sure you tie it off tightly around the LED terminal to get a good connection.
Without cutting the thread, sew to the position of the next LED, and attach onto the anode (+) side of the LED. Continue until all of the LEDs are connected (only the positive sides will be connected at this point). tie off the thread on the last LED and cut the remainder off. If you need to join threads, you can start with a new piece of thread and tie/sew it onto your previous LED or stitches to continue the circuit.
Now repeat for the cathode (-) side of the battery holder and LEDs, connecting all of the LEDs by their negative terminals.
Insert the coin cell and switch on the battery holder to light up your LEDs.
If you have any problems with LEDs not lighting up, check that you have the switch in the on position, and that all of the LEDs are around the right way (those little pluses and minuses can be difficult to read). Also check that you haven't accidentally created a short circuit by crossing the threads from the positive or negative sides of your circuit. Don't cross the streams!
Sewable LEDs come in a range of colors but I prefer to use white LEDs because they are versatile - you can place these behind translucent fabric, vinyl or lighting gel offcuts to add lights to your costumes or props.