In day one of the Uke Klass, we closed the box. Day two and three have been about fretboards and finishing:
Day two:
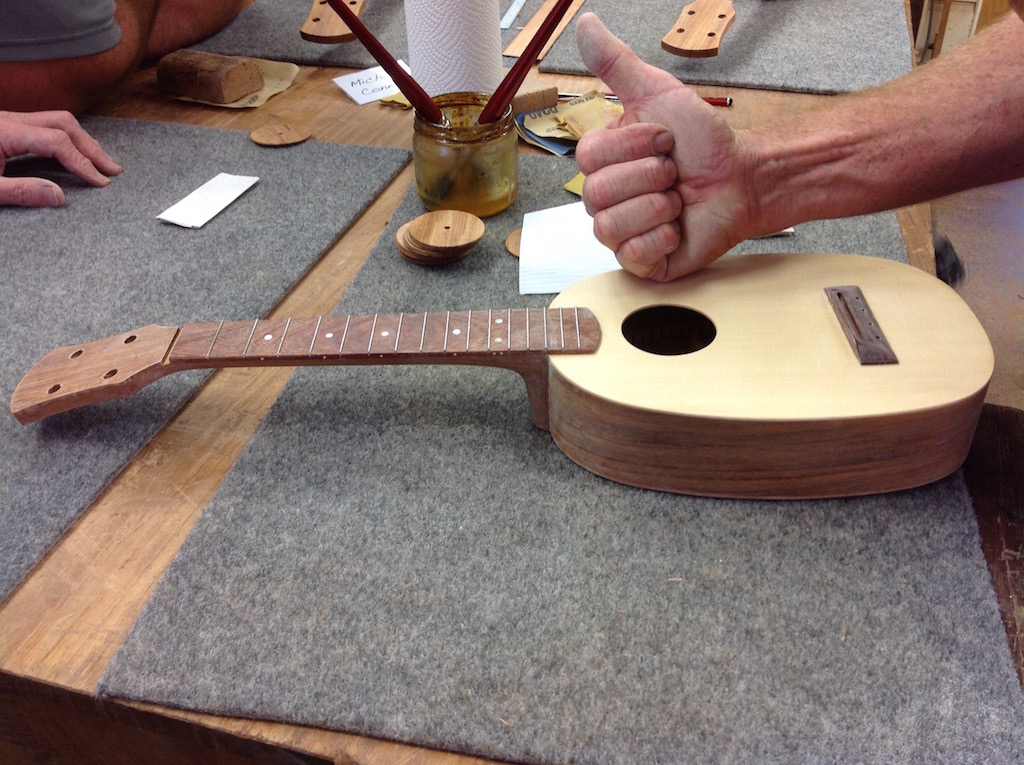
1) Our instructors had used a flush trimming router bit to trim the excess from the top and bottom around the sides to give us a head start today. Apparently this can be tricky because the bit spins clockwise and can take bits of the grain with it as we go around the round corners of the uke body. If any splinters come off, the best time to fix them is immediately using superglue (avoid using white glue like Titebond as repairs will be obvious).
Micheal demonstrates flush trimming
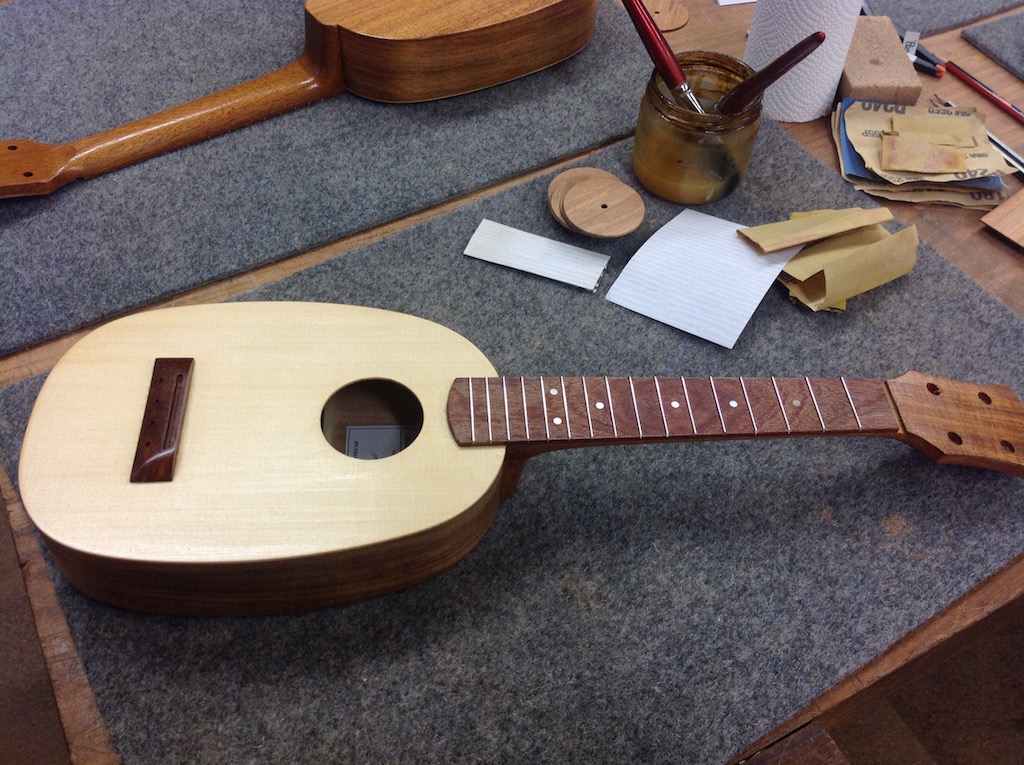
2) We pack the workboards away and move to working on a square of carpet. Using a sanding block and 180 grit sandpaper, we sand the top, back and sides, making sure to only sand flat (no rounding of edges). We use a soft brush to clean up the sawdust as we go. As the soundboards can be delicate (particularly for those with Western Red Cedar) we have to be careful to keep our carpet clean too or things on the carpet can leave indentations. Hold up to low angle light to inspect the surface, and keep sanding until sides are smooth. A couple of us had bits of wood that had shifted a bit while steaming, so the block couldn't get into these dips. We blend these in by hand sanding using half sheets of sandpaper folded in thirds. We spend a long time doing this first pass sanding because it's better to get it smooth with the 180 grit sandpaper to make the job easier when we come to sand with the finer grits later.
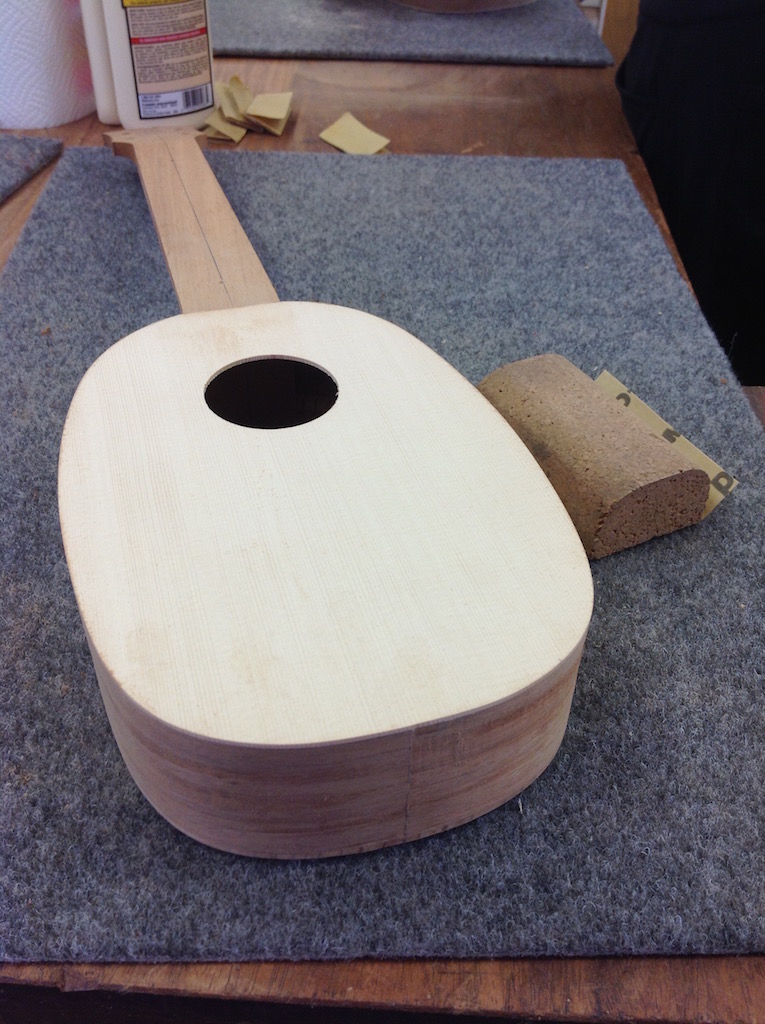
3) Because the flush trimming bit can't get into the nooks around the neck, a sharp chisel is used to tidy these bits up. Also because the back of the neck is tapered, and the trimming bit trims at 90 degrees, the chisel can be used to cut the back to the same angle as the slope at the back of the neck.
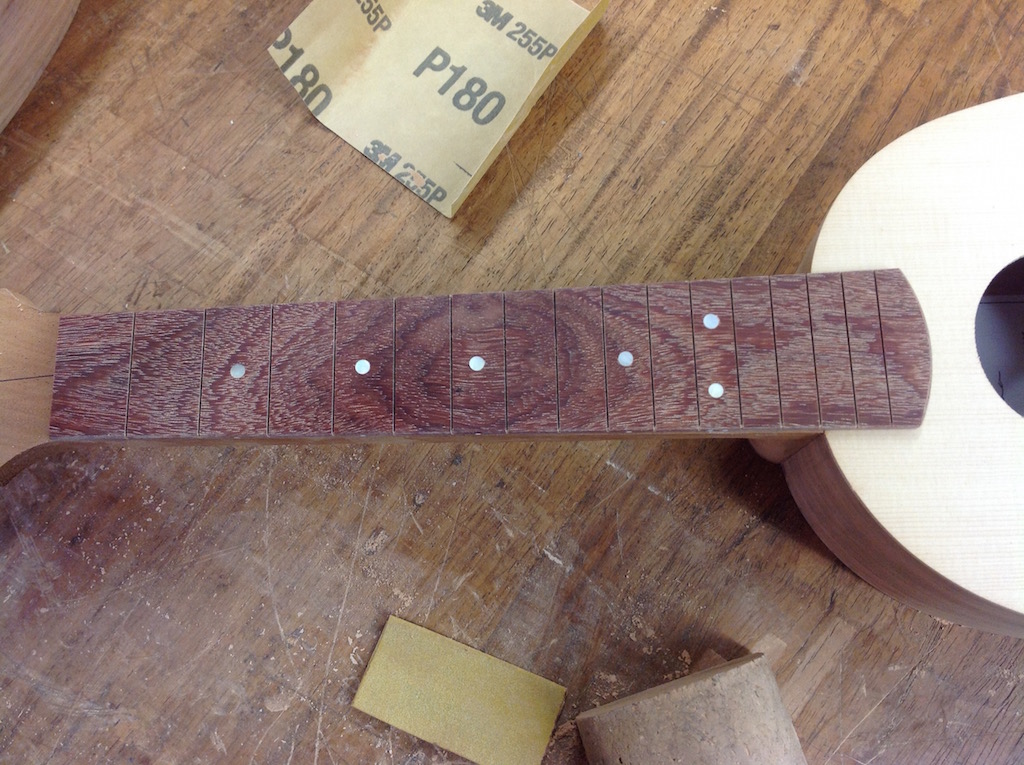
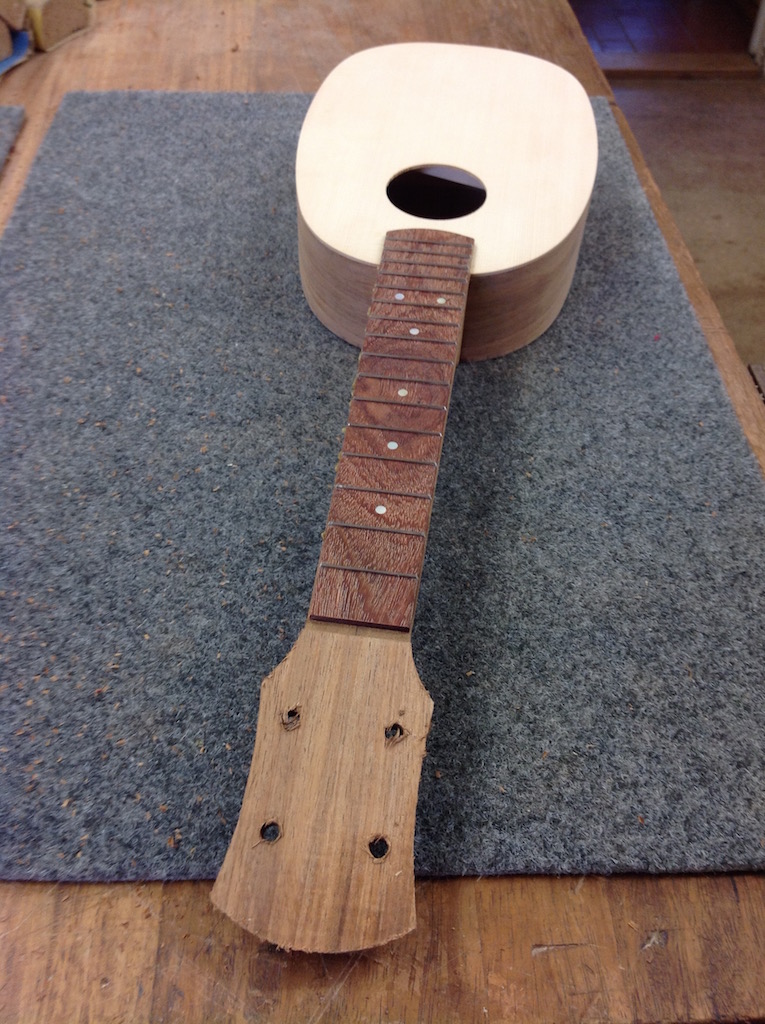
4) Now we put the carpets away and move to preparing the fretboards. Our fretboards are made from Cooktown Ironwood (also sometimes sold under the name red ebony). We select a fretboard with a pattern that we like - I chose one that reminds me of the eye of Jupiter. We can select from white or gold mother of pearl or green paua shell fret dots. I selected gold mother of pearl. These came from Mother of Pearl Supplies in Melbourne. Our kit fretboards have already been predrilled and the fret slots pre-cut because this requires a very thin specialist blade. The tiny holes for the fret markers along the side were drilled using a center drill, while the larger ones were drilled using a flat bottom bit. We pop a dot of superglue into the holes on the top, one marker at a time, then hammer each marker in place using a small metal hammer. It's better to tap away gently several times than try to get this in one big hit to avoid bruising the fretboard.
5) The fret markers on the side are made from ABS plastic filament which is 1/16th of an inch in diameter. We dab a dot of superglue in the hole, push the filament into the hole then use a razor blade to cut it flush with the side. Then hammer it gently a couple of times to make sure it's in.
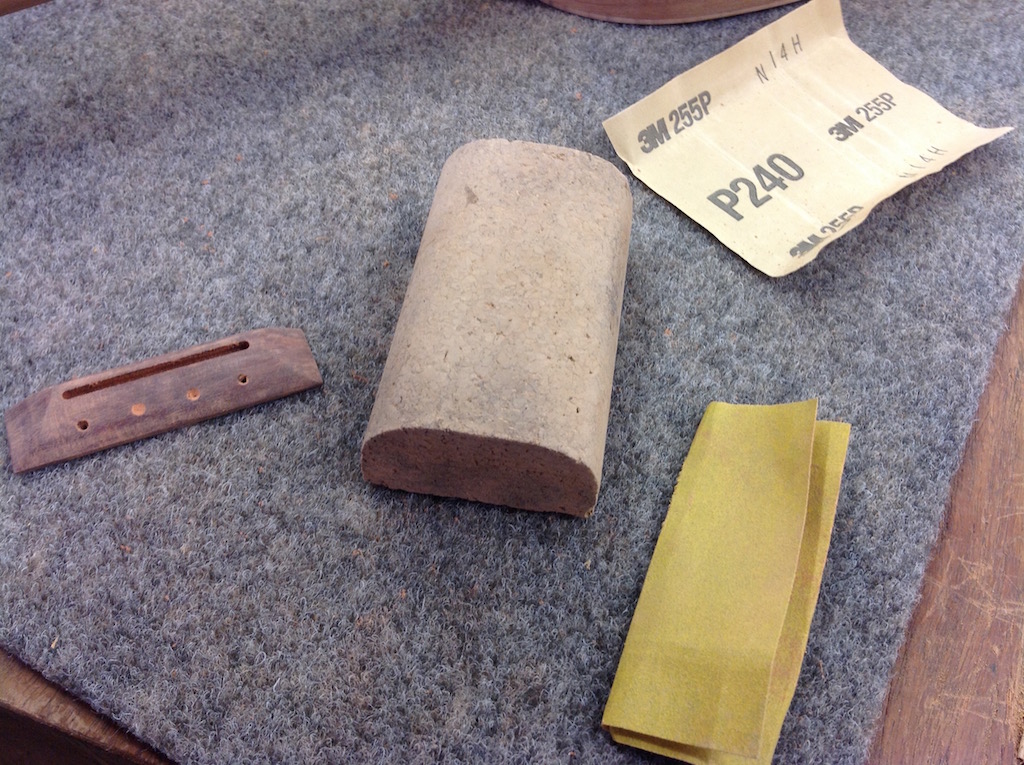
6) We sand the top of the fretboard using the sanding block and 180 grit sandpaper, to make it smooth and to remove any indentations caused by the hammering. First we sand holding our blocks at about a 45 degree angle to avoid catching the edge of the sandpaper until the mother of pearl dots are flush with the surface (they were slightly proud). They are flush when we stop seeing white lines of pearl dust from the dots being sanded. We sand for quite a while with the 180 grit until the surface is smooth, and then sand much less with 240 grit, then 400 grit and finally 600 grit. By this point the fretboard is silky smooth. If fine sawdust accumulates around the dots, it can indicate that there is a slight gap around them, dab superglue around - it will form a kind of cement with the sawdust and fill in these holes. Sawdust + superglue is also great for repairing minor holes (e.g. from worms). We very briefly lightly sand the sides of the fretboard too, and to take the edge off the corners of the top side of the fretboard only.
7) Using fret wire, which comes in long tubes (e.g. one pound), we use cutters to trim pieces roughly to size (a mm or so on either side) for a few frets at a time. Using "fret pliers", we press the frets into place. This is much less error prone than hammering and does not damage the crown of the fret wire. The fret pliers have a rounded groove and can be adjusted to help prevent pushing the frets down too far. The teeth on the bottom part of the fret wire (which is shaped like a T with a round top) should not be visible, so we need to squeeze those wires in gently with the pliers all the way along until we can't see any teeth. Getting the frets in is pretty fiddly and takes us a long time and elbow grease. As we go, we use cutters to trim the wire flush with the sides once it is in.
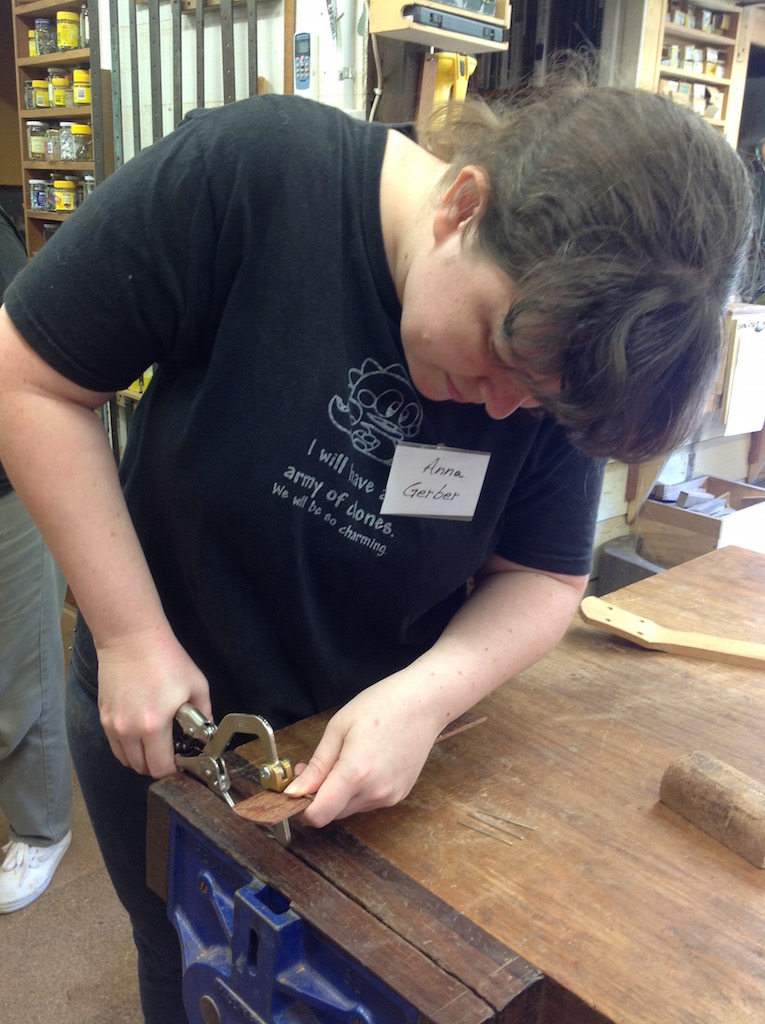
8) Holding the fretboard against a piece of reinforcing wood, the sides are dragged along the large piece of sandpaper on the bench to sand the edges of the fret wire at an angle.
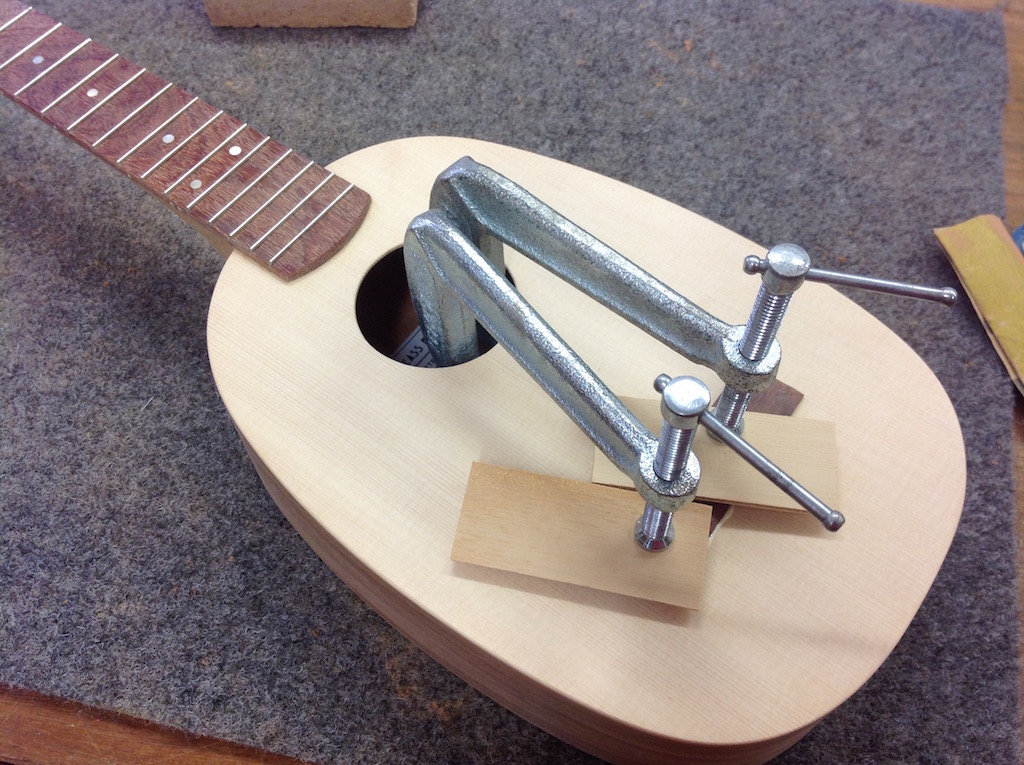
9) We clean up the workbenches to make sure all wire offcuts are gone so we won't damage the wood. We bring out the carpet pieces and clamps again.
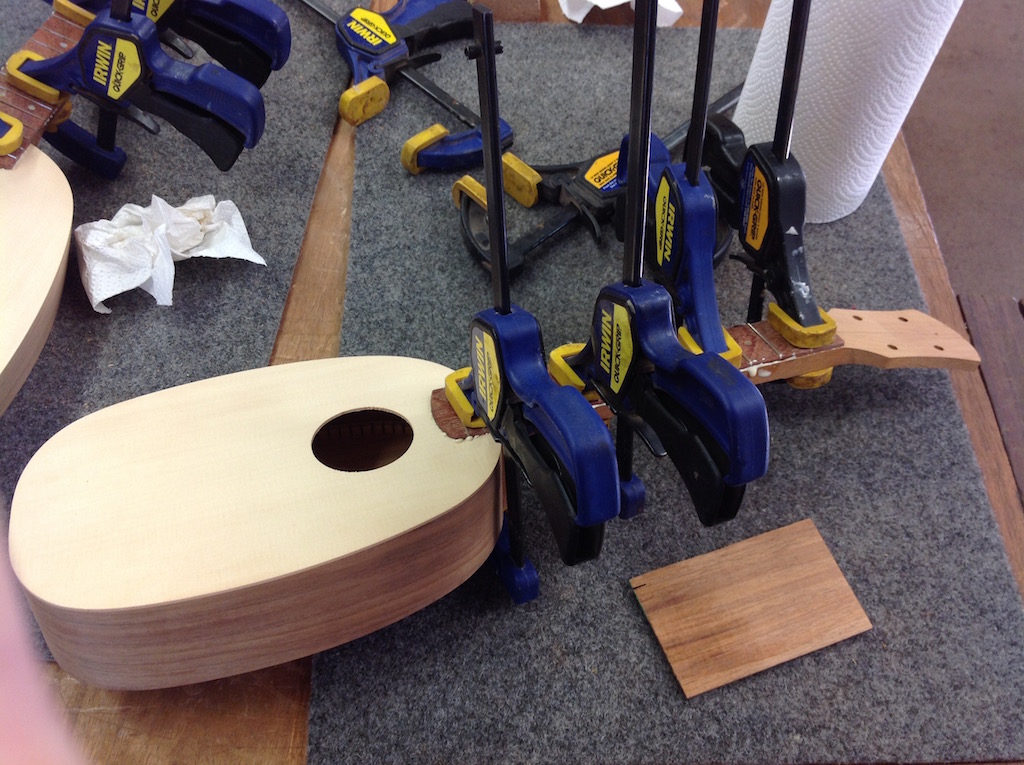
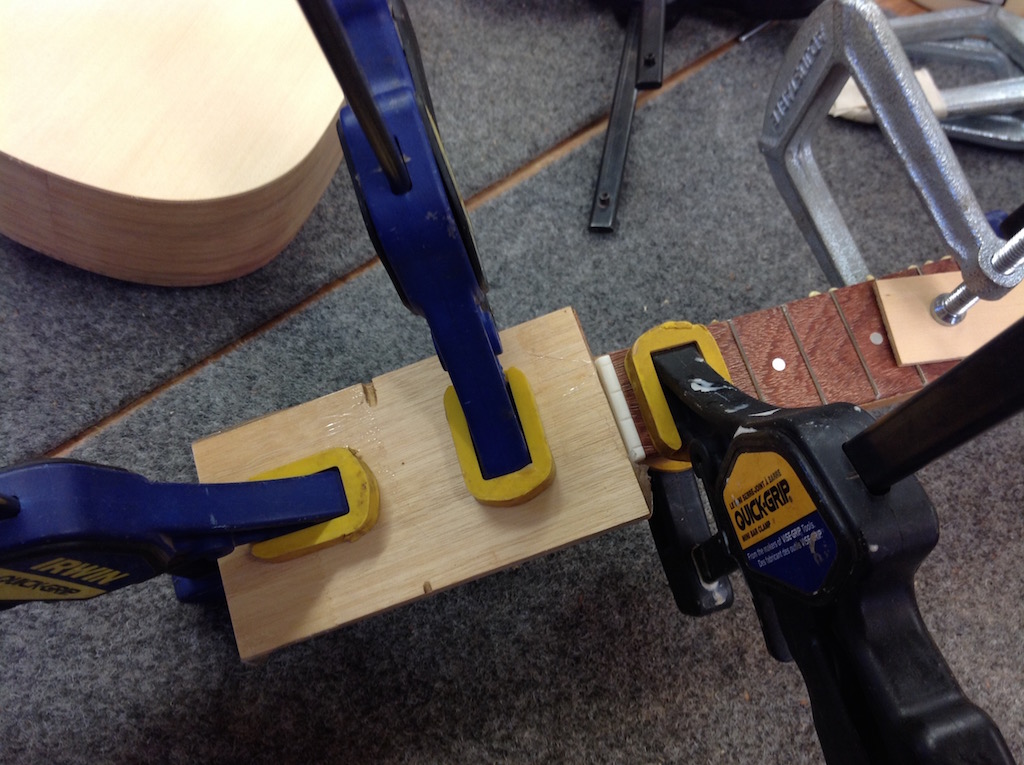
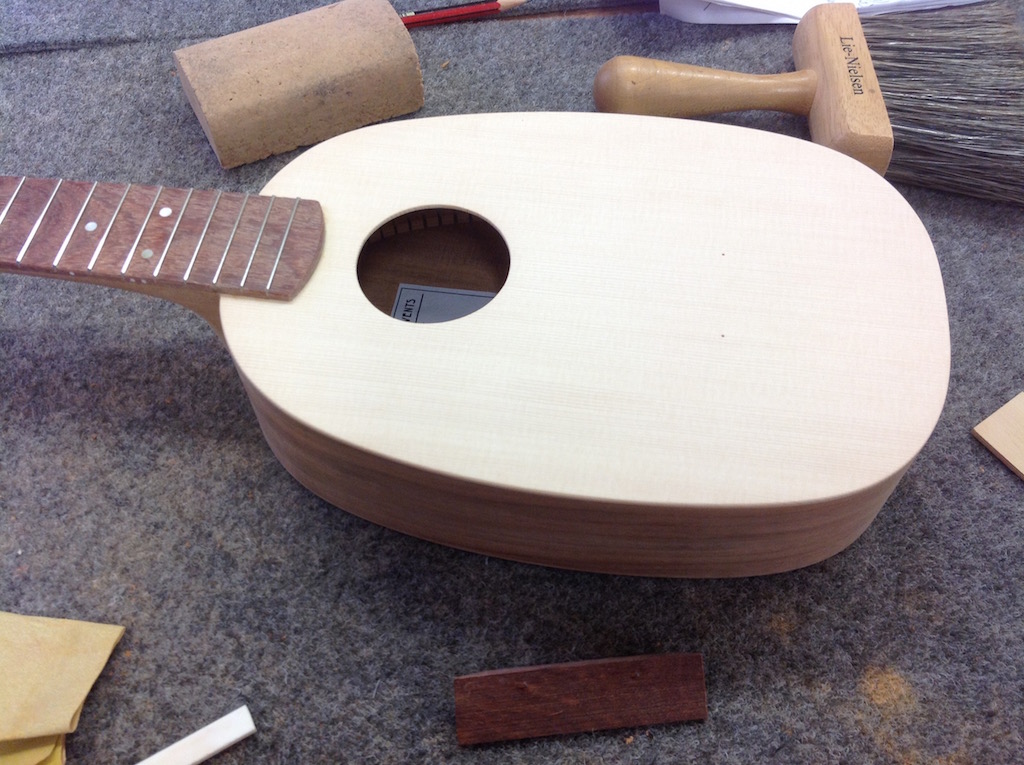
10) The fretboard meets the body typically at the 14th fret for an acoustic ukulele (or sometimes 12 on smaller ones). We apply Titebond glue all over the back of the fretboard, and position it along the neck, lining up the 14th fret, and making sure it is centered in the neck, and clamp in place along the neck in four places. We have to work fast because it's a hot, dry day and the glue is getting tacky before we have even finished spreading it. I over compensate by putting more glue to make spreading it easier but then the excess dribbles out everywhere when the board is clamped. Judging just the right amount of glue is tricky.
11) We wait for the drips of glue to dry to leathery consistency, and then use a small steel ruler to clean it up along the top and bottom of the fretboard. We don't worry too much about the glue on the sides at this point.
12) The bone nuts are sanded down so that they have the right angles on each side to fit snugly in against the neck at the top of the fretboard. We place the bone nut in position at the top of the fretboard. We're using a pegboard overlay made from Blackwood. The edge has been bevelled at an angle (of approx 14 degrees same as head) to match up with the nut, so that it will create a slot for the nut. We spread a thin coat of Titebond glue over the front of the peghead (avoiding the bit at the bottom near the nut, and then press the pegboard overlay onto it, then clamp using a clamp at the base of the head near the nut and at the top. We angle the top one as we clamp it so it will apply pressure to push the overlay tightly up against the nut. Somehow during this process my nut turns 90 degrees onto its head, making the gap for the nut wrong, which could have been a terrible mistake, but fortunately was able to be corrected before the glue dried. Eep! At this point we need to leave everything to dry again so we call it a day.
Day three:
1) The headstocks are trimmed using the router.
2) Drill the holes in the pegboard overlay using the same drill bit that drilled the holes in the peghead, then use a bit with counter bore from the front.
3) We are given a demo of how to sharpen and prepare the tool for the next job, which is scraping down the sides of the neck. We're using a Bahco (from Sweden) cabinet scraper. A burr has been put on either side to make it a cutting tool. This is done by taking a file and a small wood block to keep the file exactly perpendicular to the scraper to get a perfect 90 degree surface across the top. The same process is repeated with a diamond block. Draw a burnisher (a very hard round metal tool) at a slight angle on each side to create the burr. It only takes about 2 passes of the burnisher to create the burred edge. The advantage of the cabinet scraper is that it leaves a very smooth finish (it's better to cut material away rather than sand) and also can be used around curves e.g. at the base of the neck, where a sanding block can't get easily.
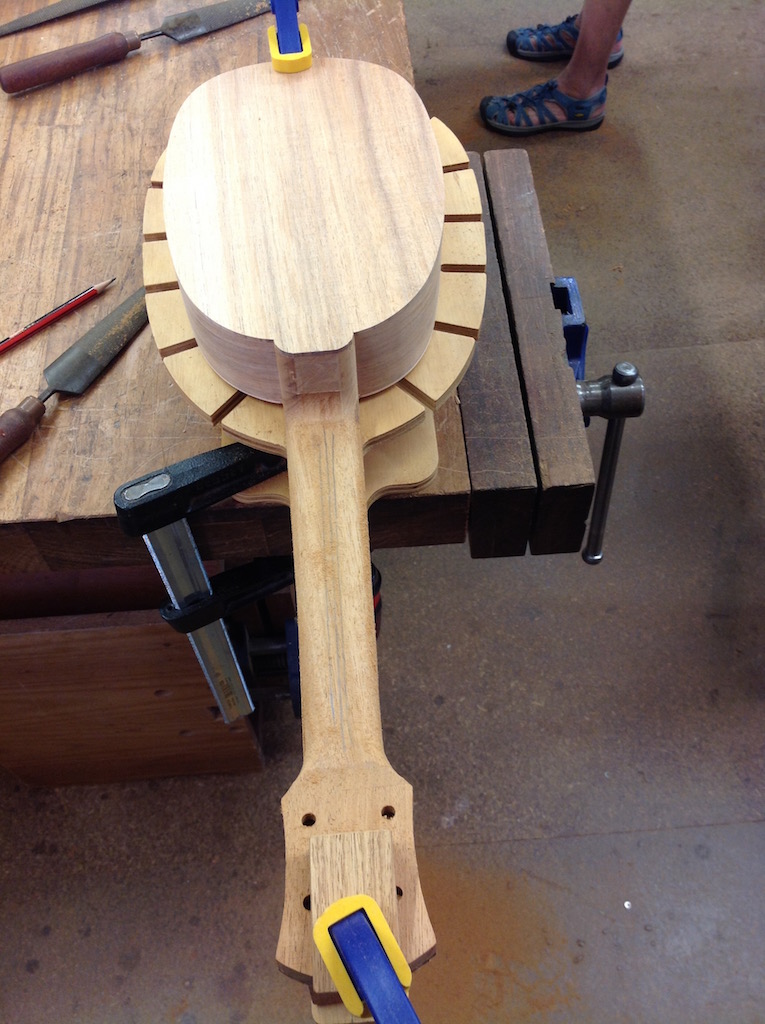
4) We pack the carpets away and clamp the workboards back on the bench with the necks sticking out. We put some flat wood under the base of the uke (face down) and clamp gently at the base. Then we use packers (angled blocks), one under the pegboard and one on top, so that we can clamp to the workboard the headstock at the top.
5) Then we use a soft pencil to draw guidelines along the neck - one line all along the center back and another (total of 2) half way between the center line and the edges on each side. We also put 2 lines on each side: one 2mm above the fretboard and the other half way between that line and the corner at the back of the neck.
6) Now we begin to shape the neck. Using a rasp with long downward strokes, we rasp the corner off the sides of the neck at an angle between the quarter lines on the back and the top line on the sides. We hold the handle in one hand, and the tip of the rasp with fingertips of the other hand holding at the very end of the rasp. When switching sides of the neck, we switch hands too, so we use the left hand to hold the handle and the right hand for the tip when rasping along the right hand side (as we look at it upside down) of the neck, and vice versa. We use the flat side of the rasp to rasp all along the sides of the neck and use the rounded side of the rasp to blend the angle in at the base of the head. We need to take care not to bang the rasp into the heel at the base of the neck.
7) Once we've rasped the top corners on each side away, we draw another line halfway between the center and the new edges on the top and center, and rasp those new two sections away (we're gradually working towards a D shape)
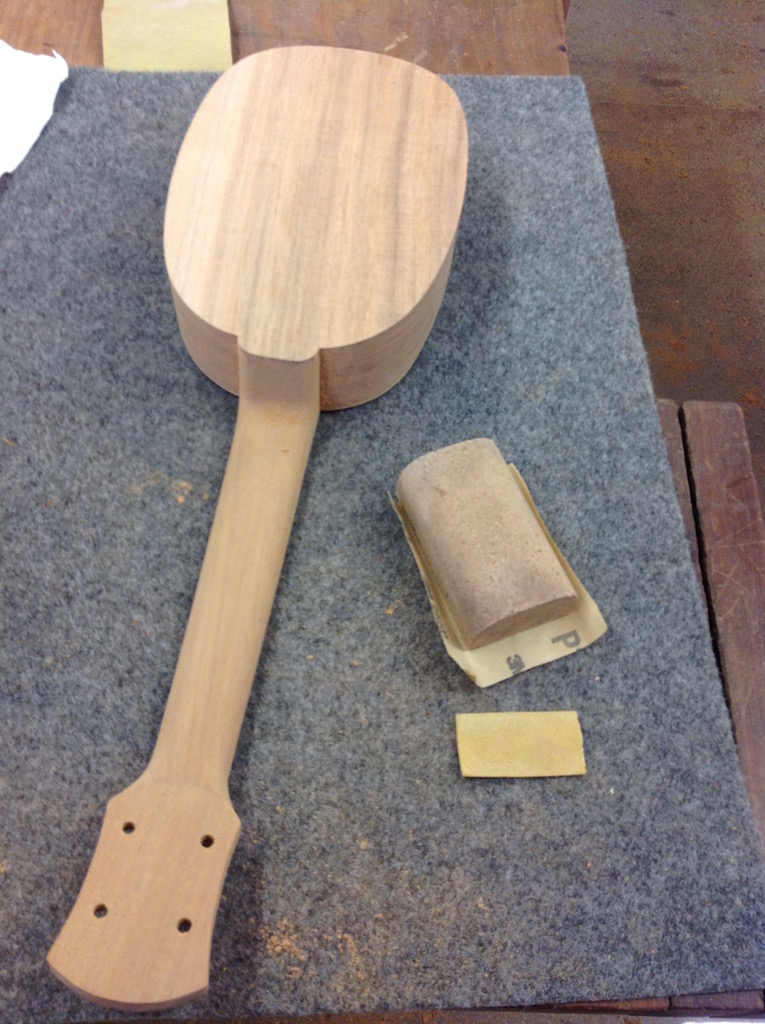
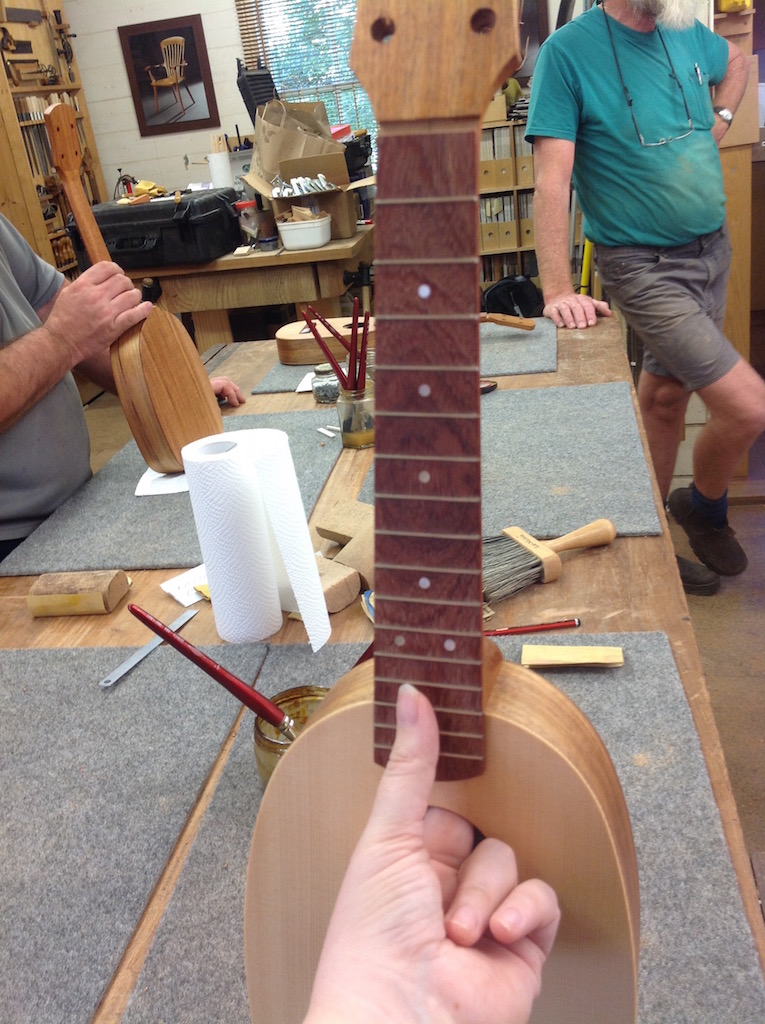
8) Once we're getting close, we switch to using a finer rasp, then the cabinet scraper. Now we use the scraper to continue to shape the neck until is more C shaped and we are happy with the way it feels in our hand (we pull the uke off the workboard and try it out, then put it back and scrape a bit more a few times). We also use a bit of folded up sandpaper to help with shaping near the head and heel of the neck.
9) Now we remove the workboards and put the carpets back in place. We sand the neck and all of the flat surfaces again (front, back, head etc) using the 180 grit sandpaper, always following the grain. This takes a long time. Then we switch to 240 grit and keep sanding until we get a very smooth finish. We also use the 240 grit sandpaper to slightly round the edges along the body, and take the sharpness off the edges on the head. We also sand around the inside of the soundhole a very minimal amount (just enough to smooth out).
10) We choose a bridge (I chose Cooktown ironwood to match my fretboard). We also sand that (on the top only) following the grain with 180 and then 240 grit sandpaper.
11) We're ready to attach the bridge: We put the nut in place and use a jig to measure where the bridge should go. The bridge is placed, and two very small holes are drilled down through the bridge on either side in slot where the saddle will go.
12) We take the bridge off and using a tiny ball peen hammer, hammer two panel pins into the holes in the bridge, with the ends sticking out the back by a few mm that we will use to hold it in place when we glue it.
13) We spread Titebond on the back of the bridge and carefully line the pins up with the holes on the body, then press down with fingers. We put some thin bits of wood on the top and use clamps into the soundhole to hold the bridge while it dries over lunch.
14) After lunch the clamps and pins are removed from the bridge, and any glue that has squeezed out needs to be removed using the small steel ruler.
15) We're using a shellac with metho and wax finish. We apply the shellac using long, careful strokes, always following the same pattern of application - we start with the front of the head, then around the top and sides of the head, then back of head, then around the heel at the back of the neck (at first this is thirsty (i.e. it absorbs a lot of shellac), so we do a double pass here the first couple of coats). Then we over the back with long smooth coats (following the grain), then bridge, then around inside sound hole, then top, then back of neck. The brush should land on the surface like a butterfly with sore feet.
16) In between coats, we balance the ukes by placing a couple of fingers inside the soundboard. After each coat is dry, we do another. We do about 5 coats.
17) Then we sand all over using 400 grit sandpaper, making sure we take the shine off all over. This is called "snick back" because we are snicking the top off any grain that has stood up during the shellacing. De-nibbing is similar but usually for fixing small bits in the final finish. First we "break the back" of the sandpaper by rubbing the inside of it over the edge of the workbench. Then we fold it in thirds. We sand all over with a very light touch (letting the sandpaper do the work), and following the grain isn't necessary - we can sand lightly in small round circles on tricky bits. Avoid sanding edges or breaking through finish (don't sand too hard).
18) We leave the white dust created by sanding the shellac over the surface, as this will help with the next coat. After getting "inspected" and given the ok to continue, we do another coat, very carefully, as we can't fix runs as easily this time. After it has dried, we do our final coat.
Tomorrow we'll be going over this with steel wool and waxing, then learning how to setup our instruments and finally stringing them. I can't wait to play my Jupiter and hear how it sounds!